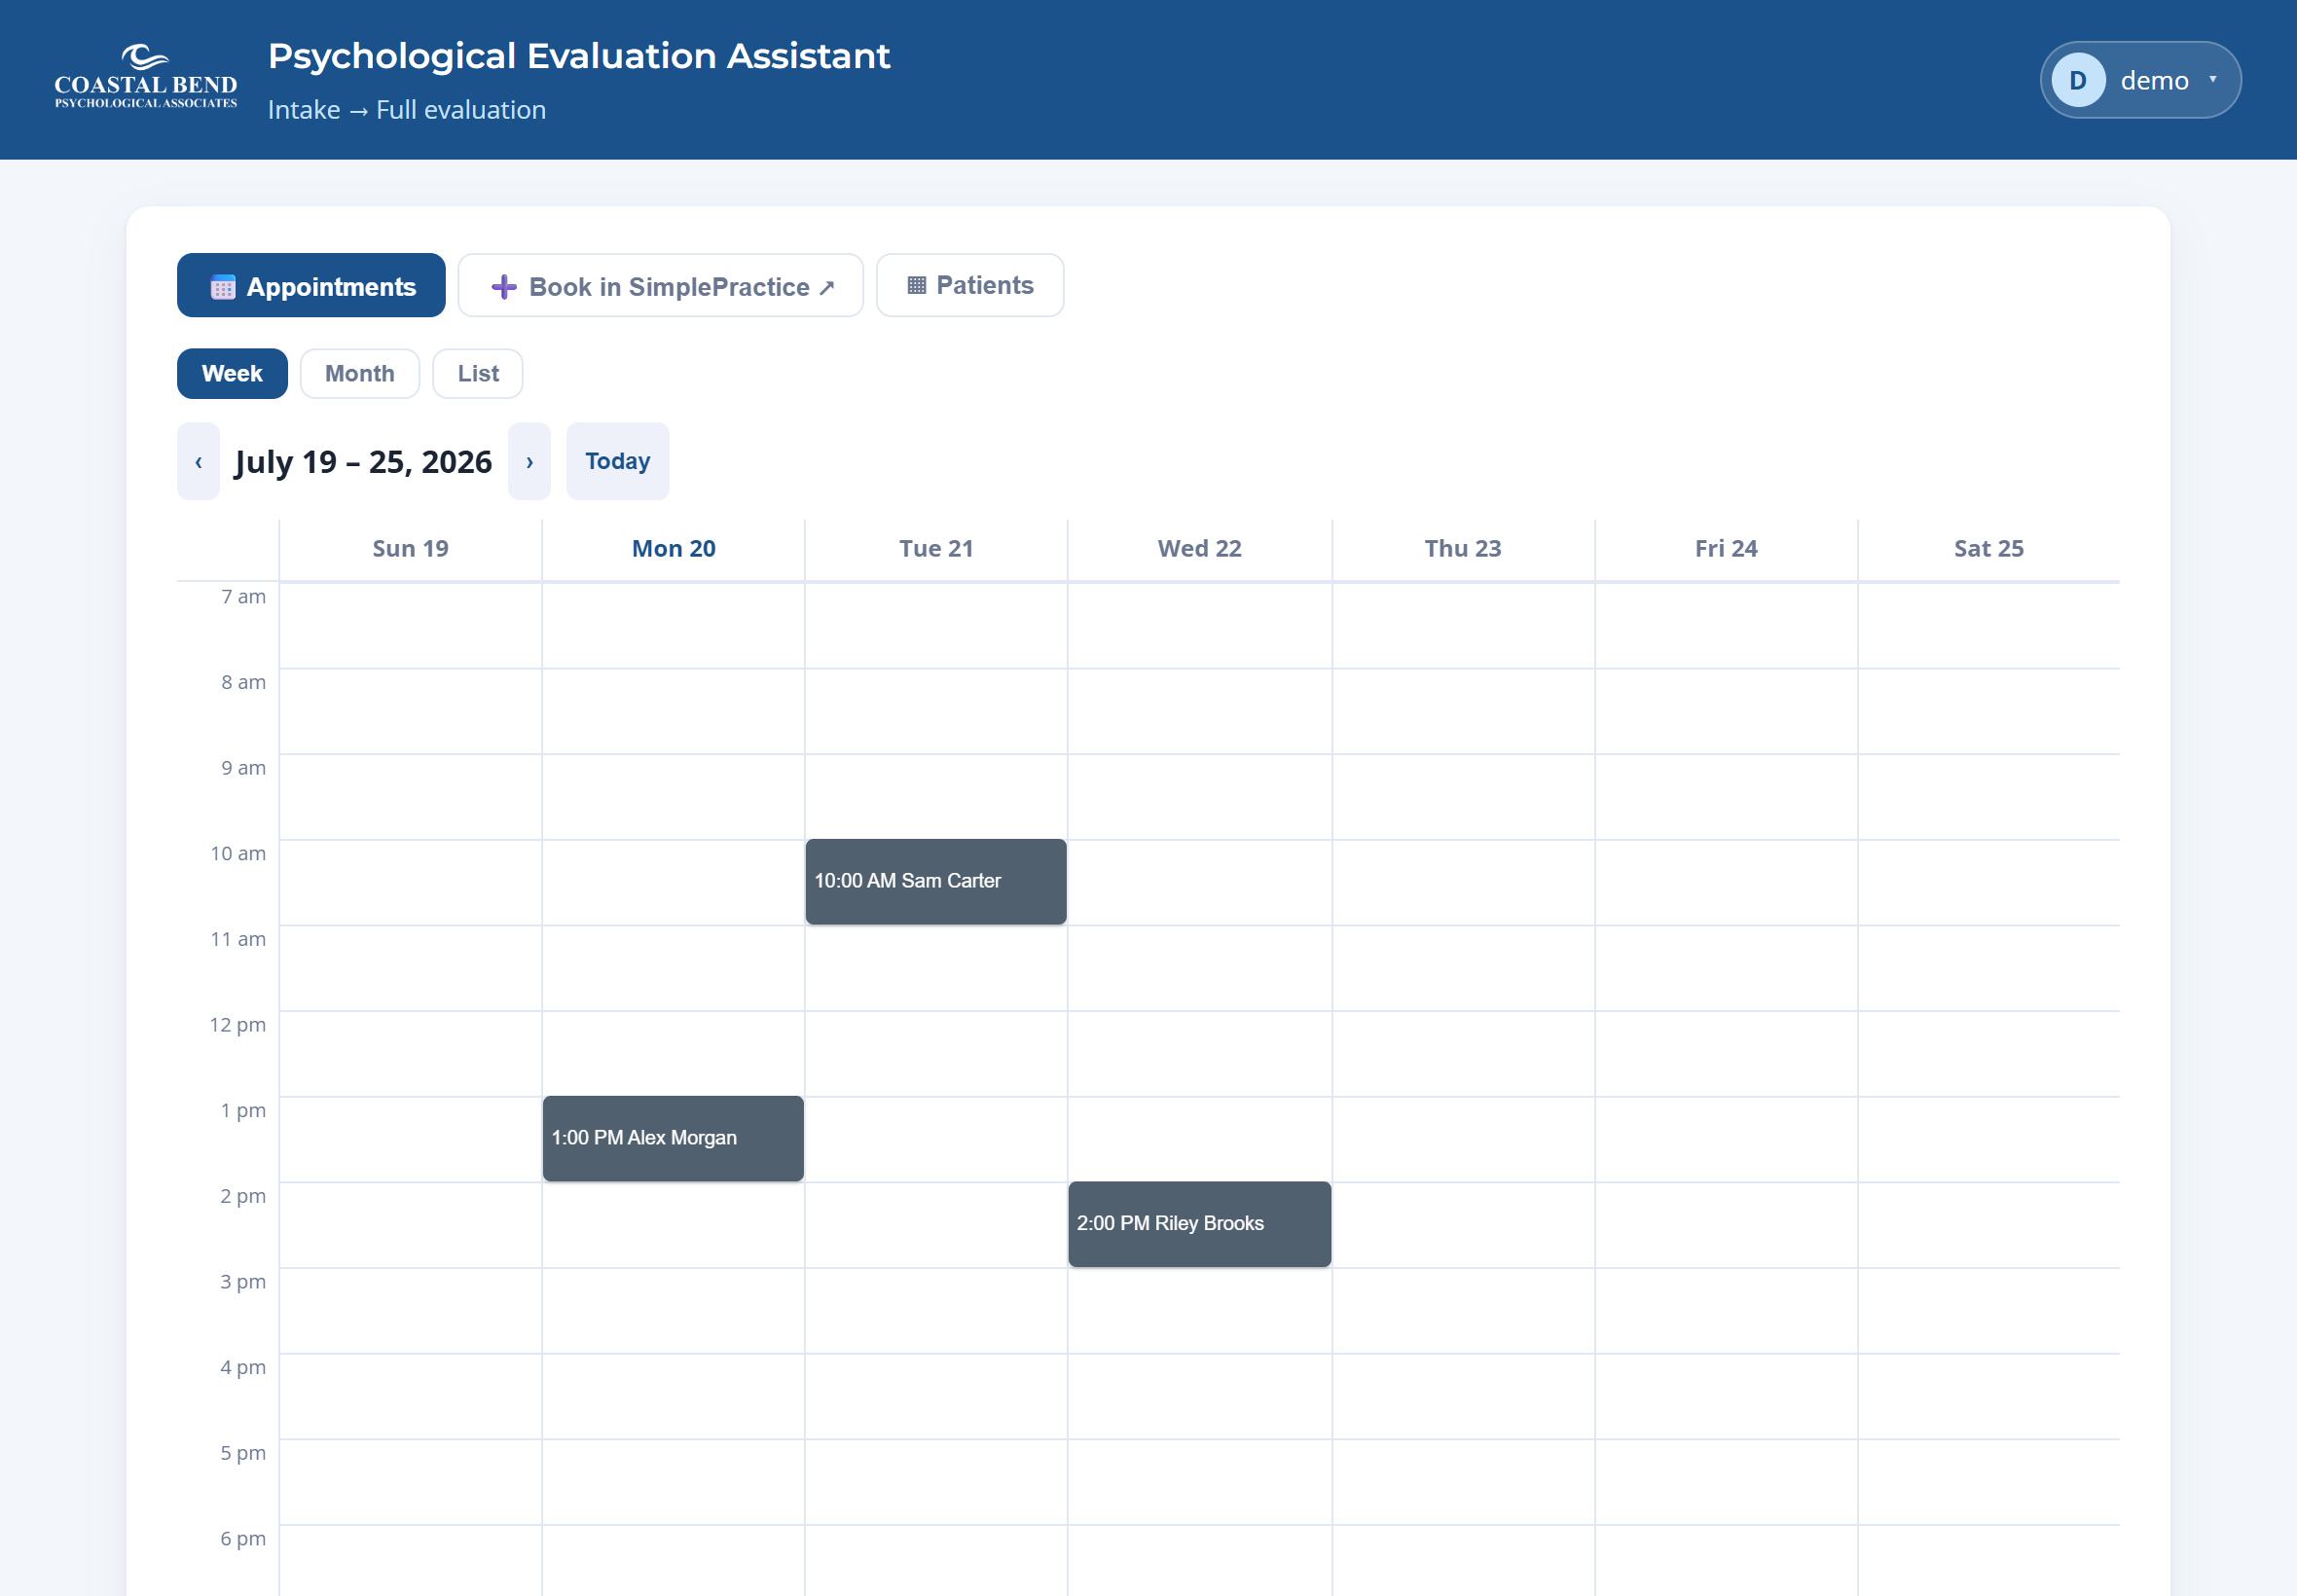
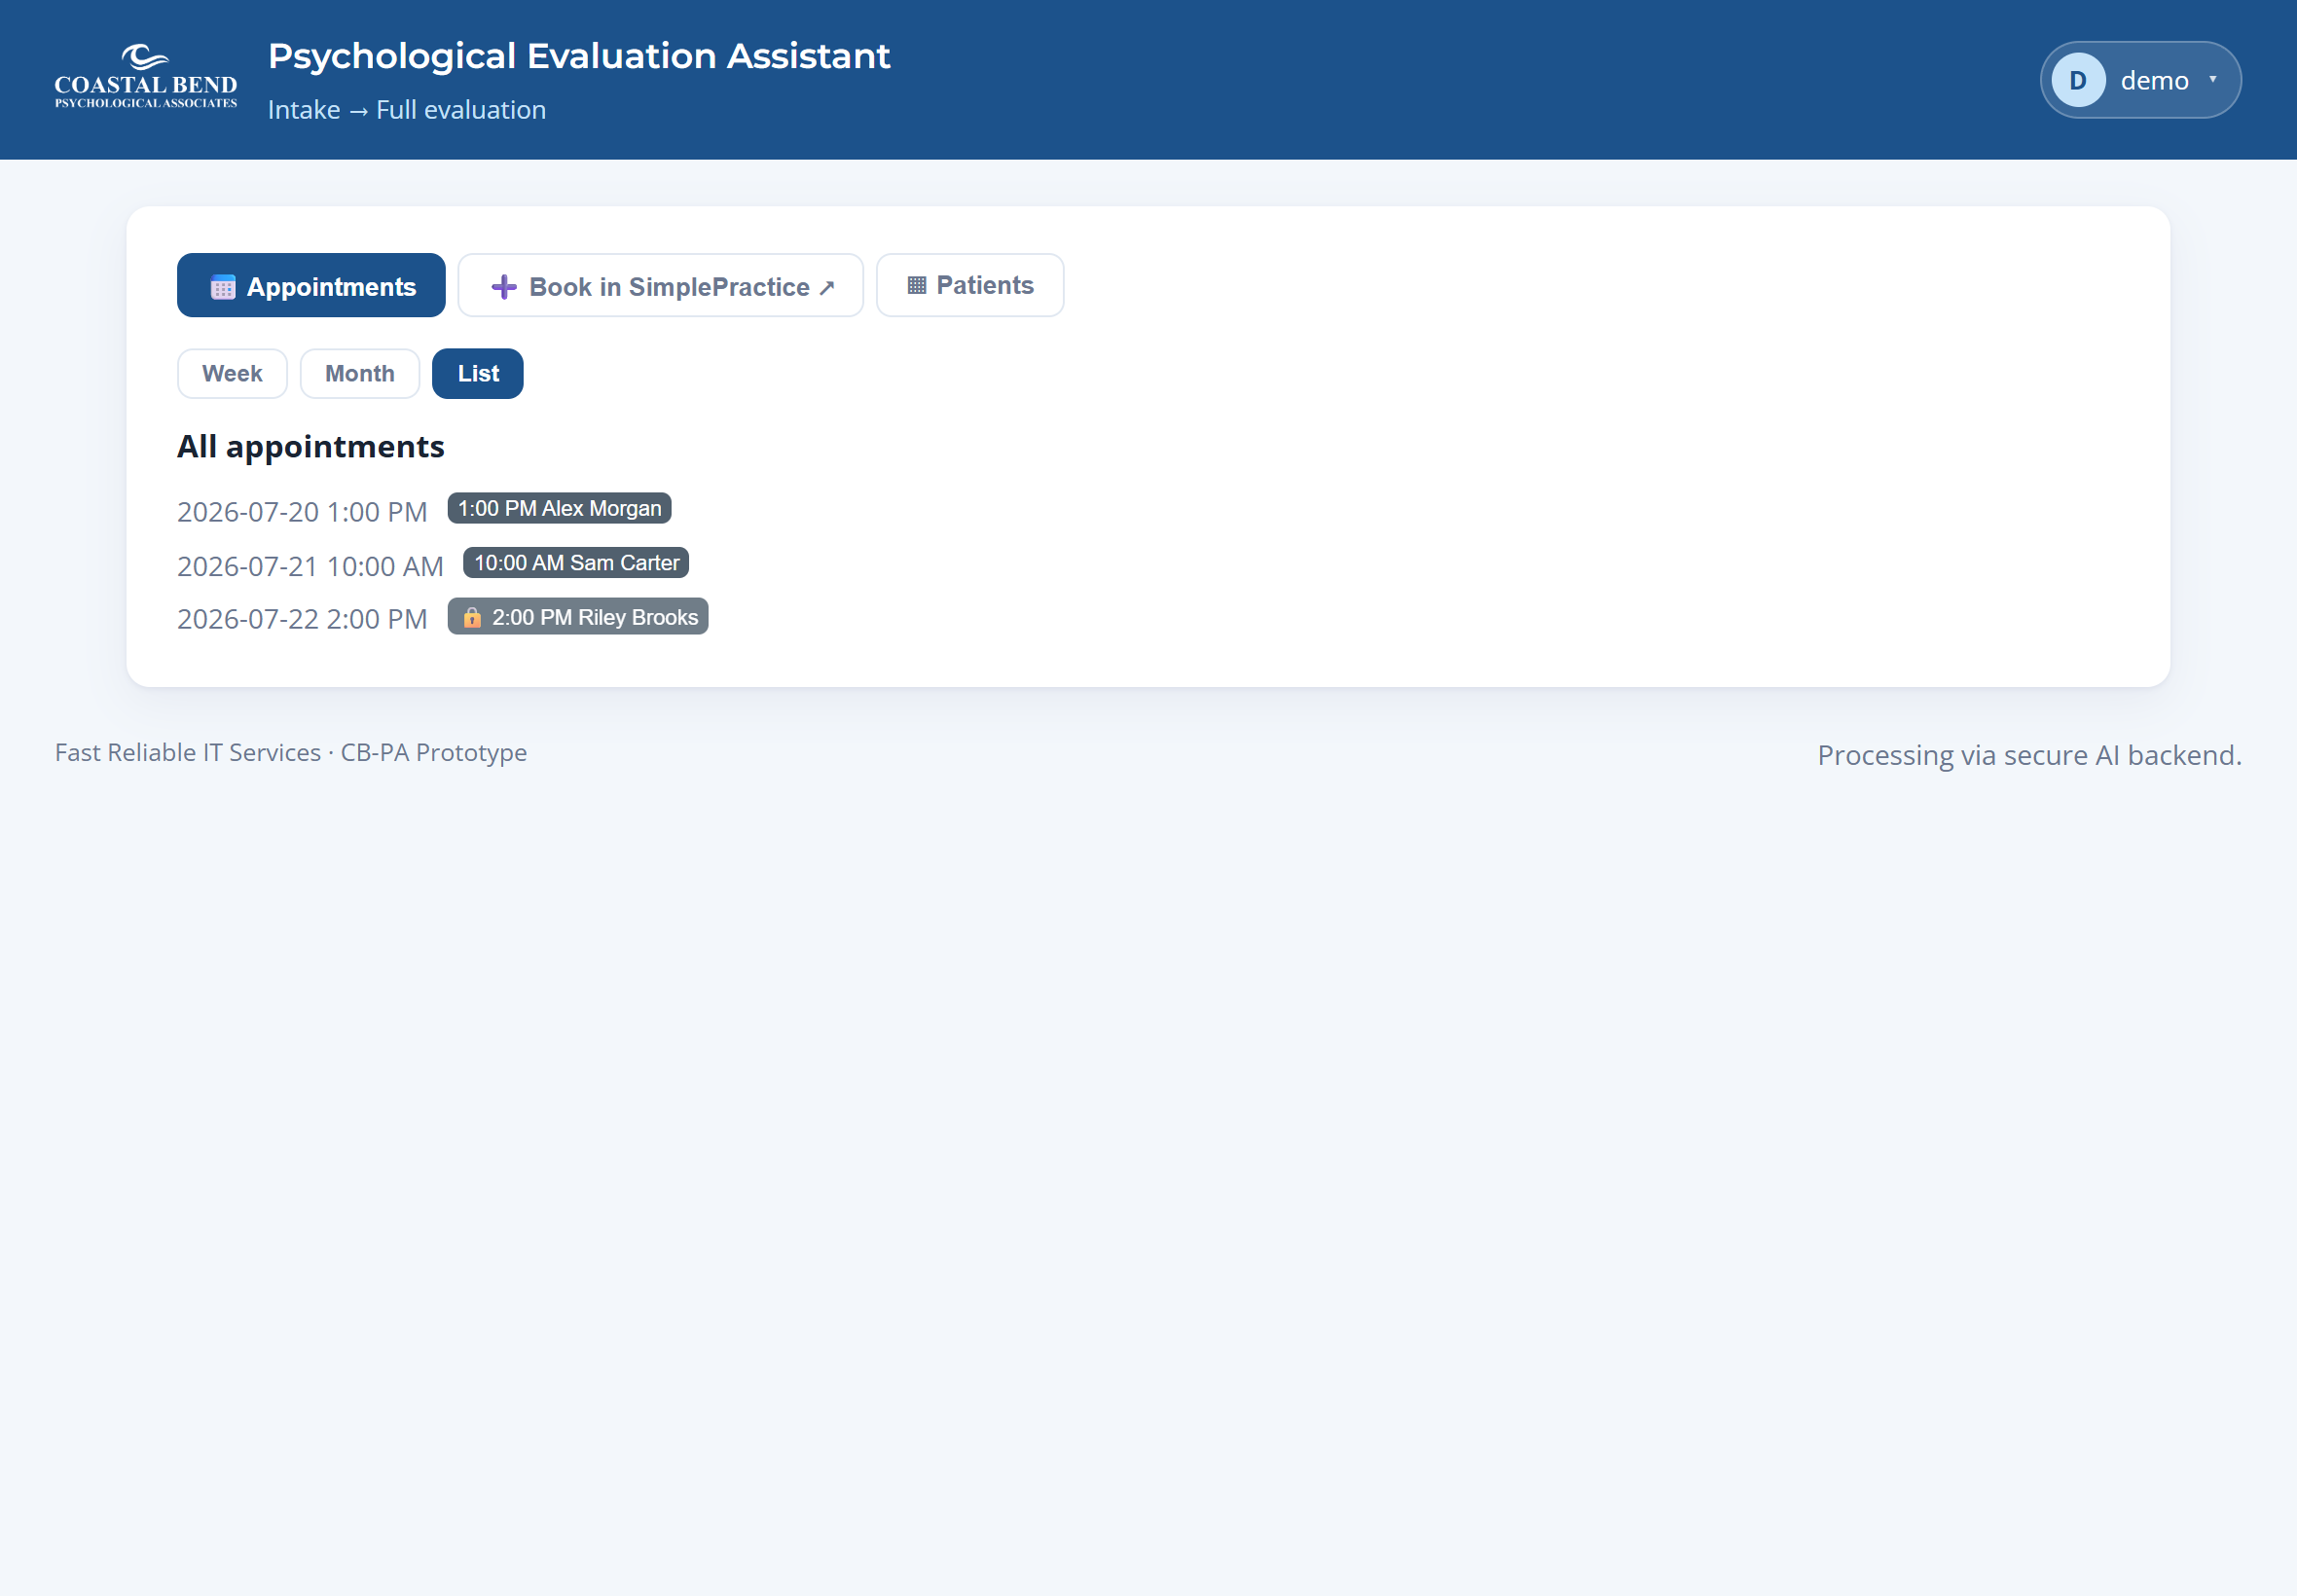
Read-only: SimplePractice appointments appear in the calendar (gray) and open in SimplePractice when clicked.
➕ Add a user
Add someone by their Microsoft email and check every role they should have. They sign in with Microsoft; if they have more than one role they get a switcher to pick which one they're acting as.
👥 Users & permissions
Check or uncheck roles to change what each person can do. Changes are saved instantly and logged.
User
Email
Roles
Created
Manage roles
Most recent first — logins, evaluations, user & permission changes.
Time (Texas / CT)
Actor
Action
Detail
IP
Signed in as —
Your signature
Applied to a report only when you sign it. Each psychologist manages their own signature.
Change password
❓ Help & Guide
Welcome to the Psychological Evaluation Assistant
This app takes a clinical case from the moment an appointment is booked all the way to a signed, exported psychological evaluation. It reads the scores in the test reports for you, drafts the write-up in the clinic's style, and lets you correct anything before it is finalized.
You can read this guide top to bottom, or jump to your role. If this is your first time, use the Guided walkthrough — it follows one complete case, screen by screen.
The people involved (roles)
Receptionist — schedules appointments (in SimplePractice) and can see the calendar and patient list.
Drafter — receives the intake, uploads the test reports, generates the draft, and edits it. The drafter does everything the psychologist does except sign.
Psychologist — does everything the drafter does, and is the only one who can Sign (finalize) the report.
Roughly 20–30 minutes of active work per evaluation, most of it in step 5 (reviewing and correcting the draft).
Read this first — three things that matter
1. The AI can misread a document. The app uses AI vision to read the numbers off each test report. It is good, but not perfect — a "72" can be read as "12", a scale can be mislabeled, or a value can be missed. Always check the score tables against the original report before you sign. Every number is editable (see below).
2. Everything in the draft is editable. Click any heading, paragraph, score, diagnosis, or recommendation to change it. The document you see is exactly what gets exported — what you type is what prints. Edits save automatically.
3. Nothing leaves your hands until you act. A draft stays private to whoever is working on it. It only moves forward when you press Submit for review, and it is only finalized when the psychologist presses Sign. Before that, you can change anything.
One more: the little attention flags (⚑) next to scores are an on-screen aid only — they help you notice concerning values. They never appear in the exported report.
Guided walkthrough — one complete case
This follows a sample patient, "Alex Morgan," from booking to a signed report. The data here is fake — no real patient information. Your screens will look the same with real cases.
1 Book the appointment ~1 min · Receptionist
Booking happens in SimplePractice, the clinic's scheduling system. In the app, open Appointments and click ➕ Book in SimplePractice ↗ — it opens SimplePractice in a new tab. Once booked there, the appointment appears on the app's calendar automatically.
The reception calendar (Week view). Booked appointments show as blue blocks. Switch between Week / Month / List, and use Patients to look someone up.
2 Receive the intake ~2–4 min · Psychologist / Drafter
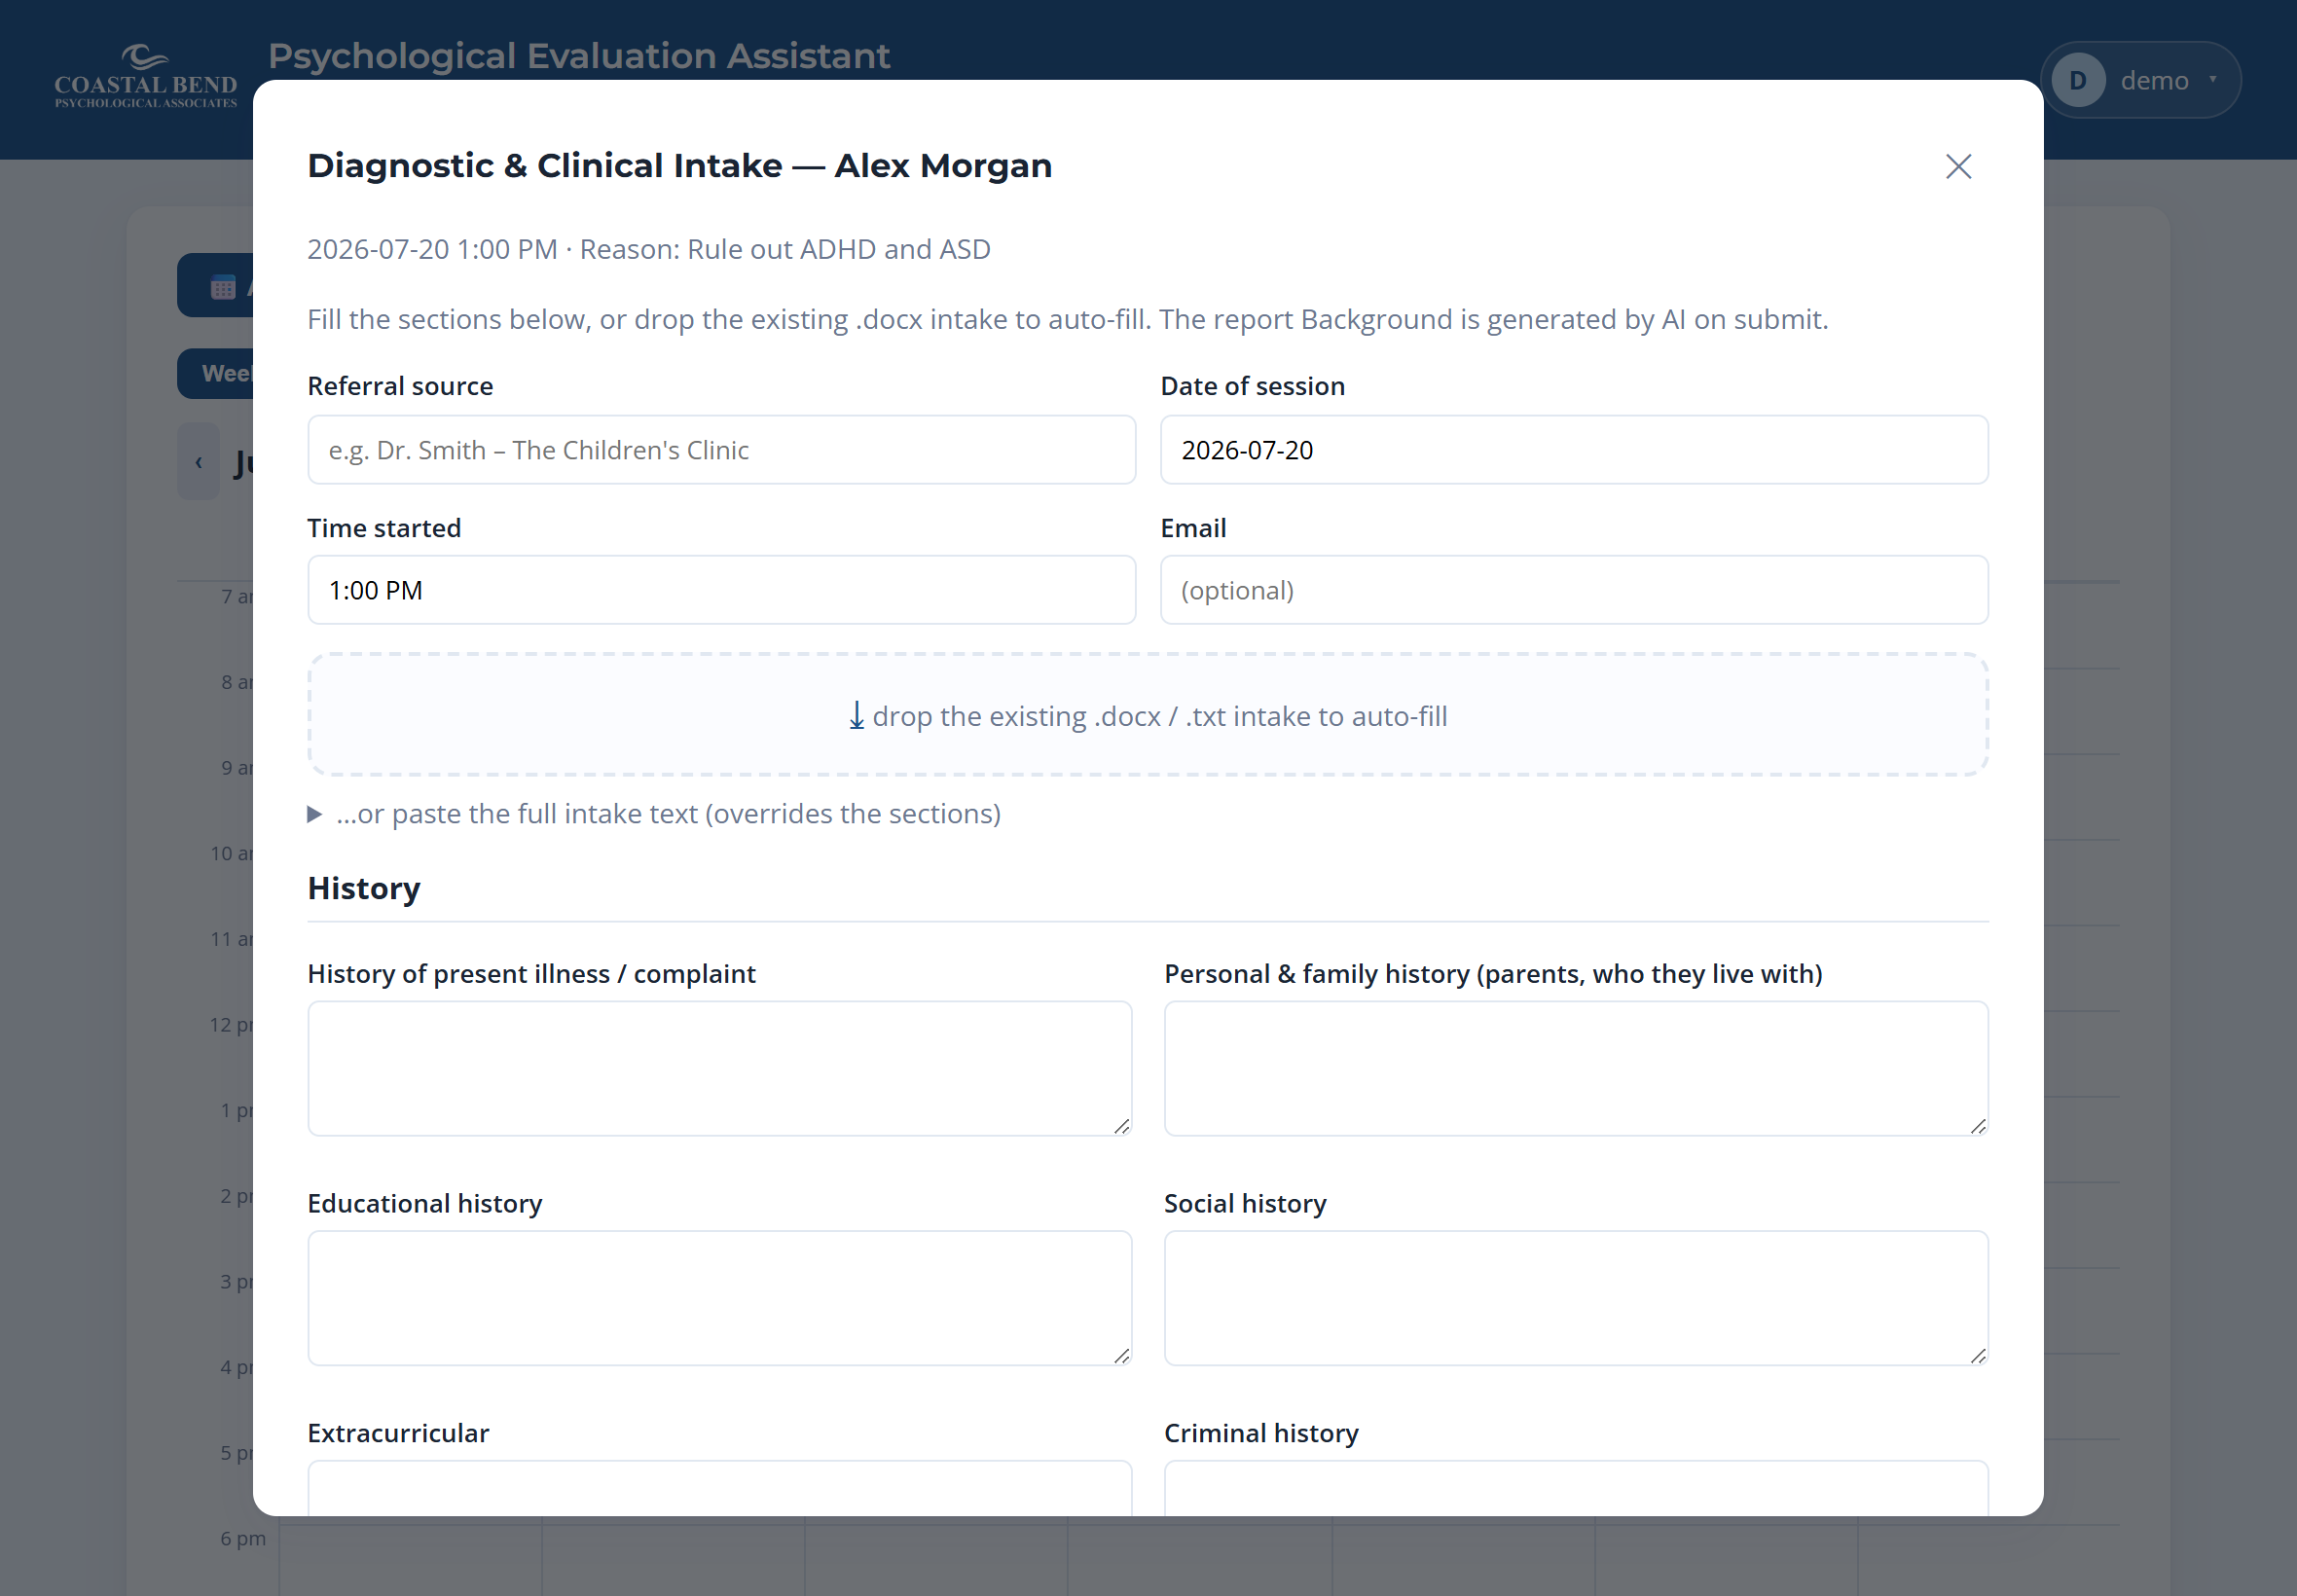
On the day of the evaluation, open the appointment and choose Attend → Do intake. Fill in the intake sections, or simply drop the existing .docx / .txt intake onto the form to auto-fill it. When you submit, the app captures the identity and history and, on demand, writes the report's Background.
The intake form. You can type the sections, drop a Word/Text file to auto-fill, or paste the full intake text.
3 Upload the test reports ~1–2 min · Drafter
Open the evaluation. In the Test reports panel, drop the PDF reports from QGlobal / MHS (you can select several at once). These are the source documents the app reads the scores from.
4 Generate the draft ~1–3 min · Drafter
Press ✨ Generate report. The app reads the scores and graphs from the uploaded reports and writes the full evaluation in the clinic's style — background, per-test summaries, the integrative summary, and recommendations. This takes a minute or two; you'll see progress.
Generation uses AI to read the documents. Treat the result as a strong first draft, not a final answer — step 5 is where you verify it.
5 Review and edit — the important part ~10–20 min · Drafter / Psychologist
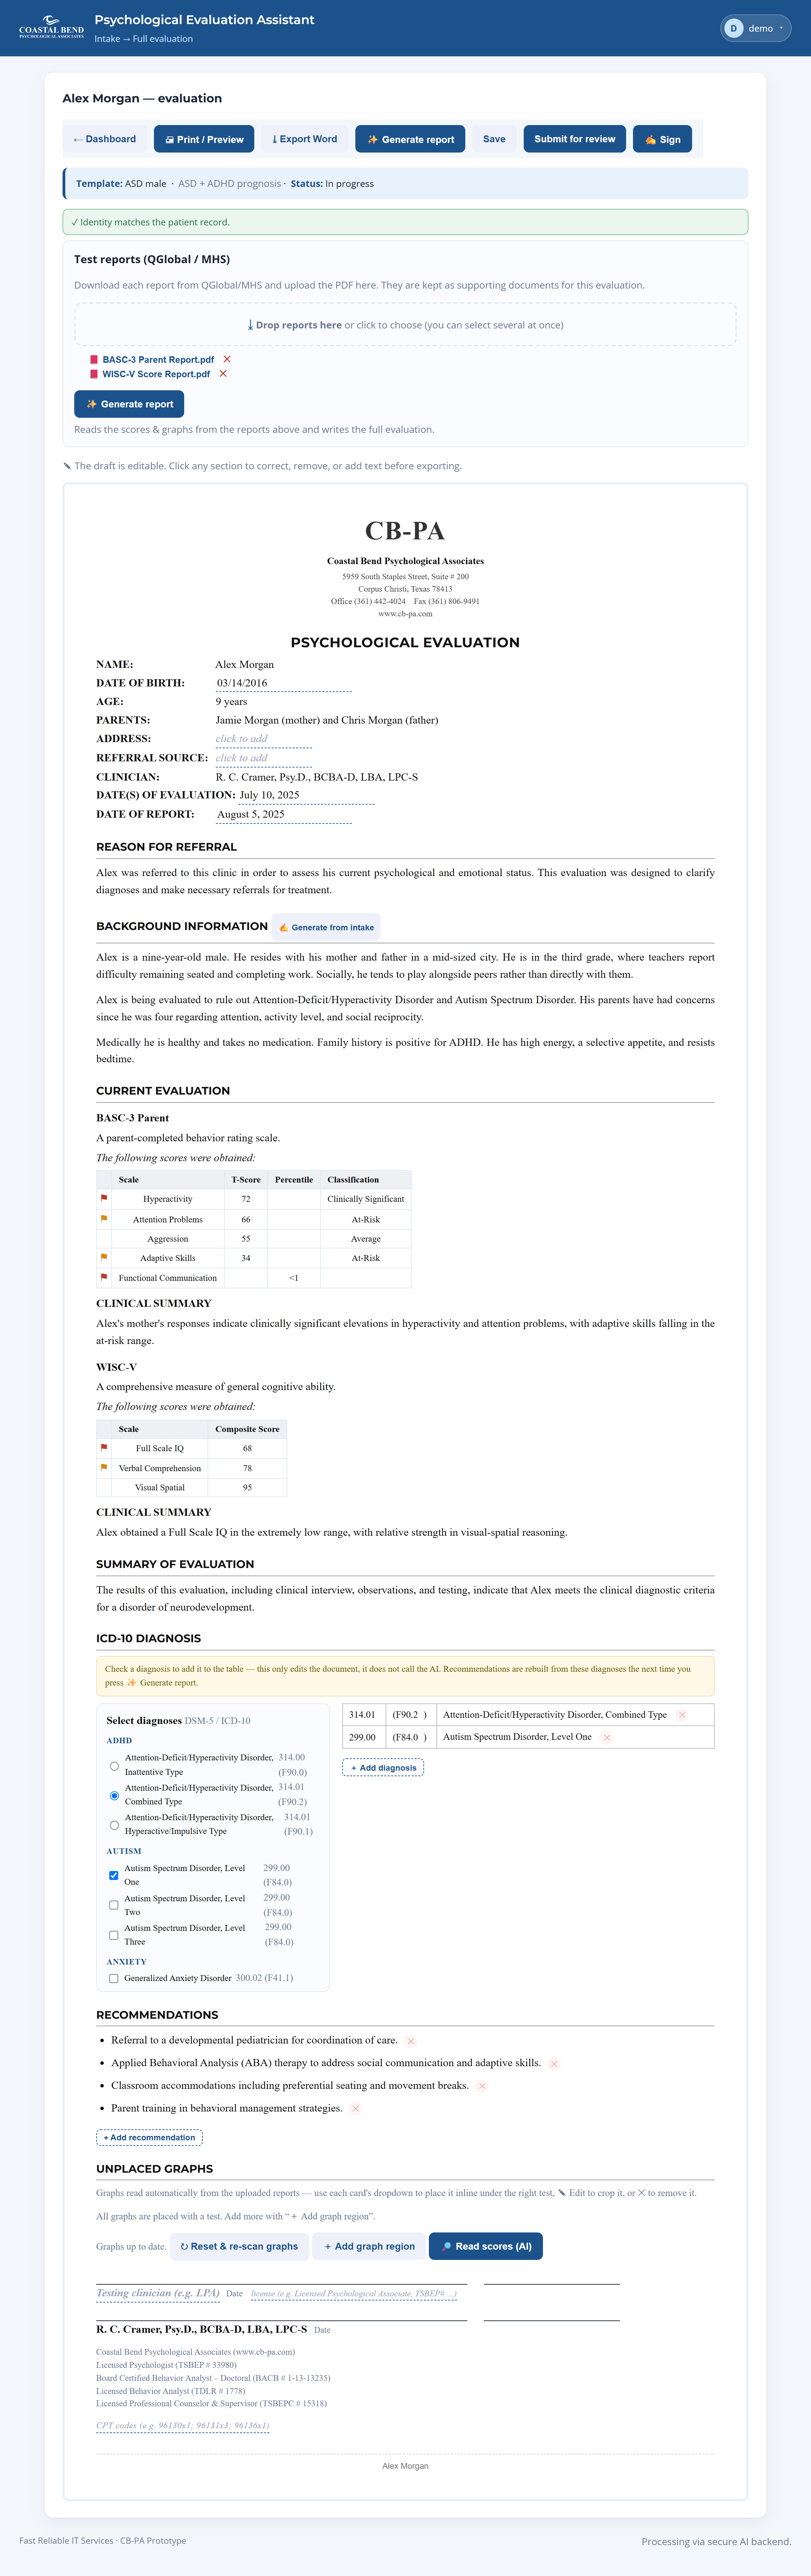
The whole document is now on screen and fully editable. This is the report exactly as it will export.
The complete draft (scroll inside the frame to see it all): letterhead & identity, Reason for Referral, Background, per-test scores and summaries, Summary of Evaluation, Diagnosis, and Recommendations. Click anything to edit it.
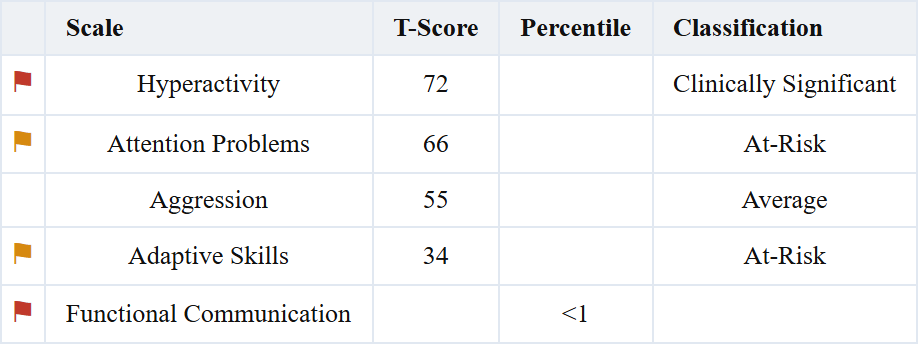
Check the scores against the original reports. Each test shows a typed score table. The attention flags (⚑) point out concerning values — red for the strongest concern, amber for milder — but they are just a nudge. If a number was misread, click the cell and correct it.
A score table. The ⚑ marks are on-screen only. Any value, scale, or classification cell can be clicked and edited.
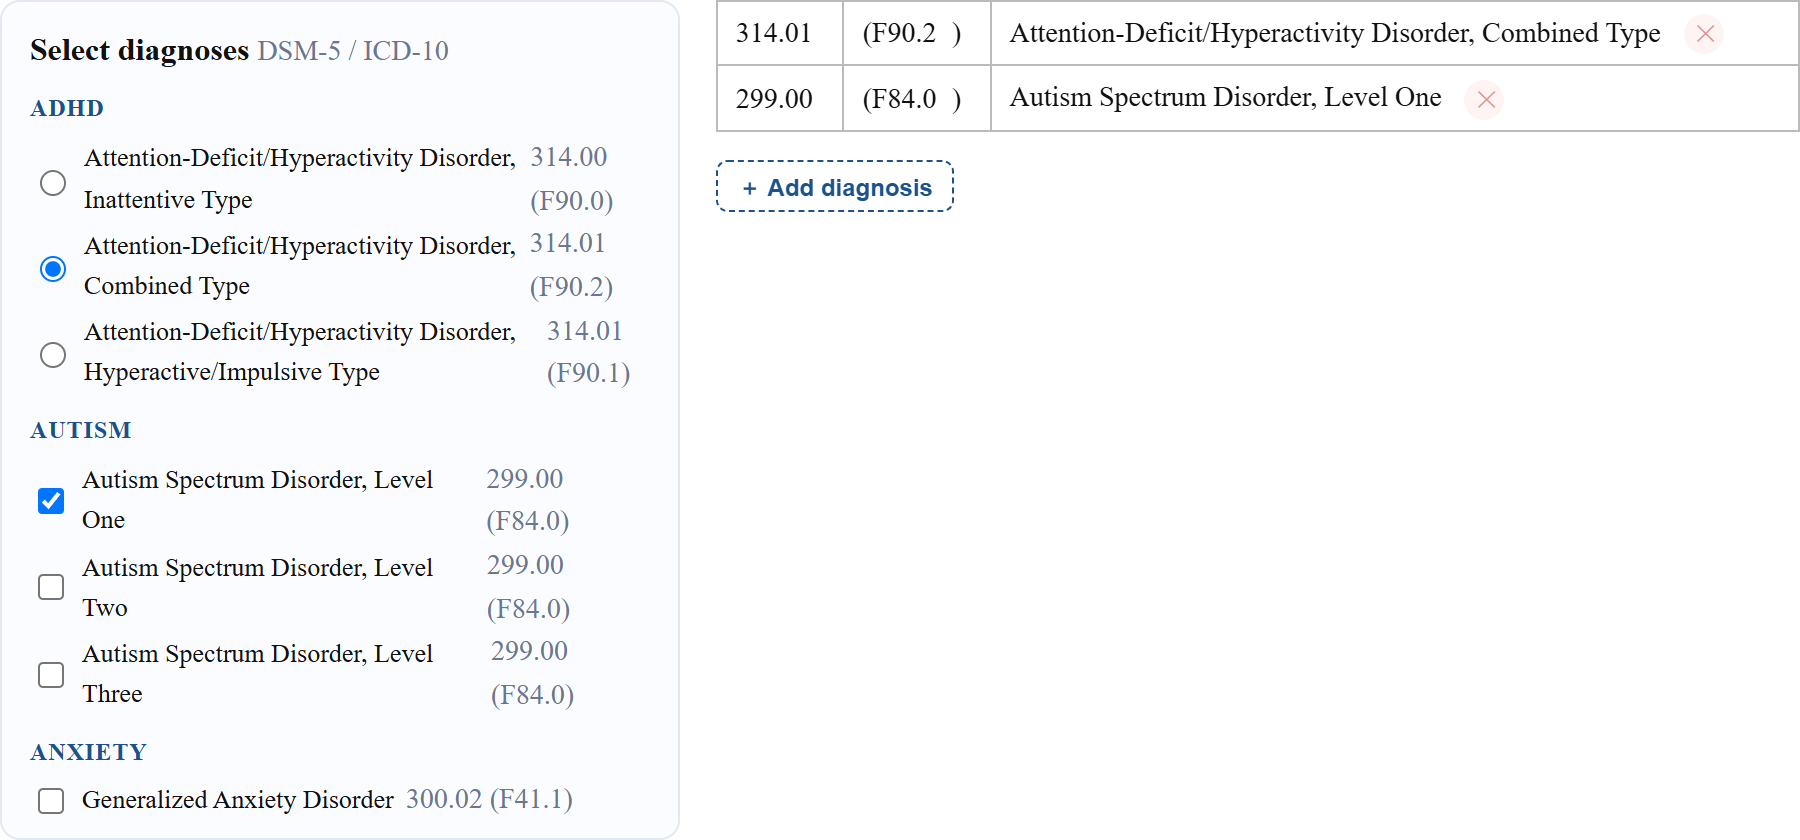
Set the diagnoses. Check the boxes in the picker on the left; each one you check appears in the diagnosis table on the right. You can also type a diagnosis directly, or add one that isn't in the list.
Checking a diagnosis only edits the document — it does not call the AI. Recommendations are rebuilt from these diagnoses the next time you press Generate.
6 Submit, then Sign ~seconds
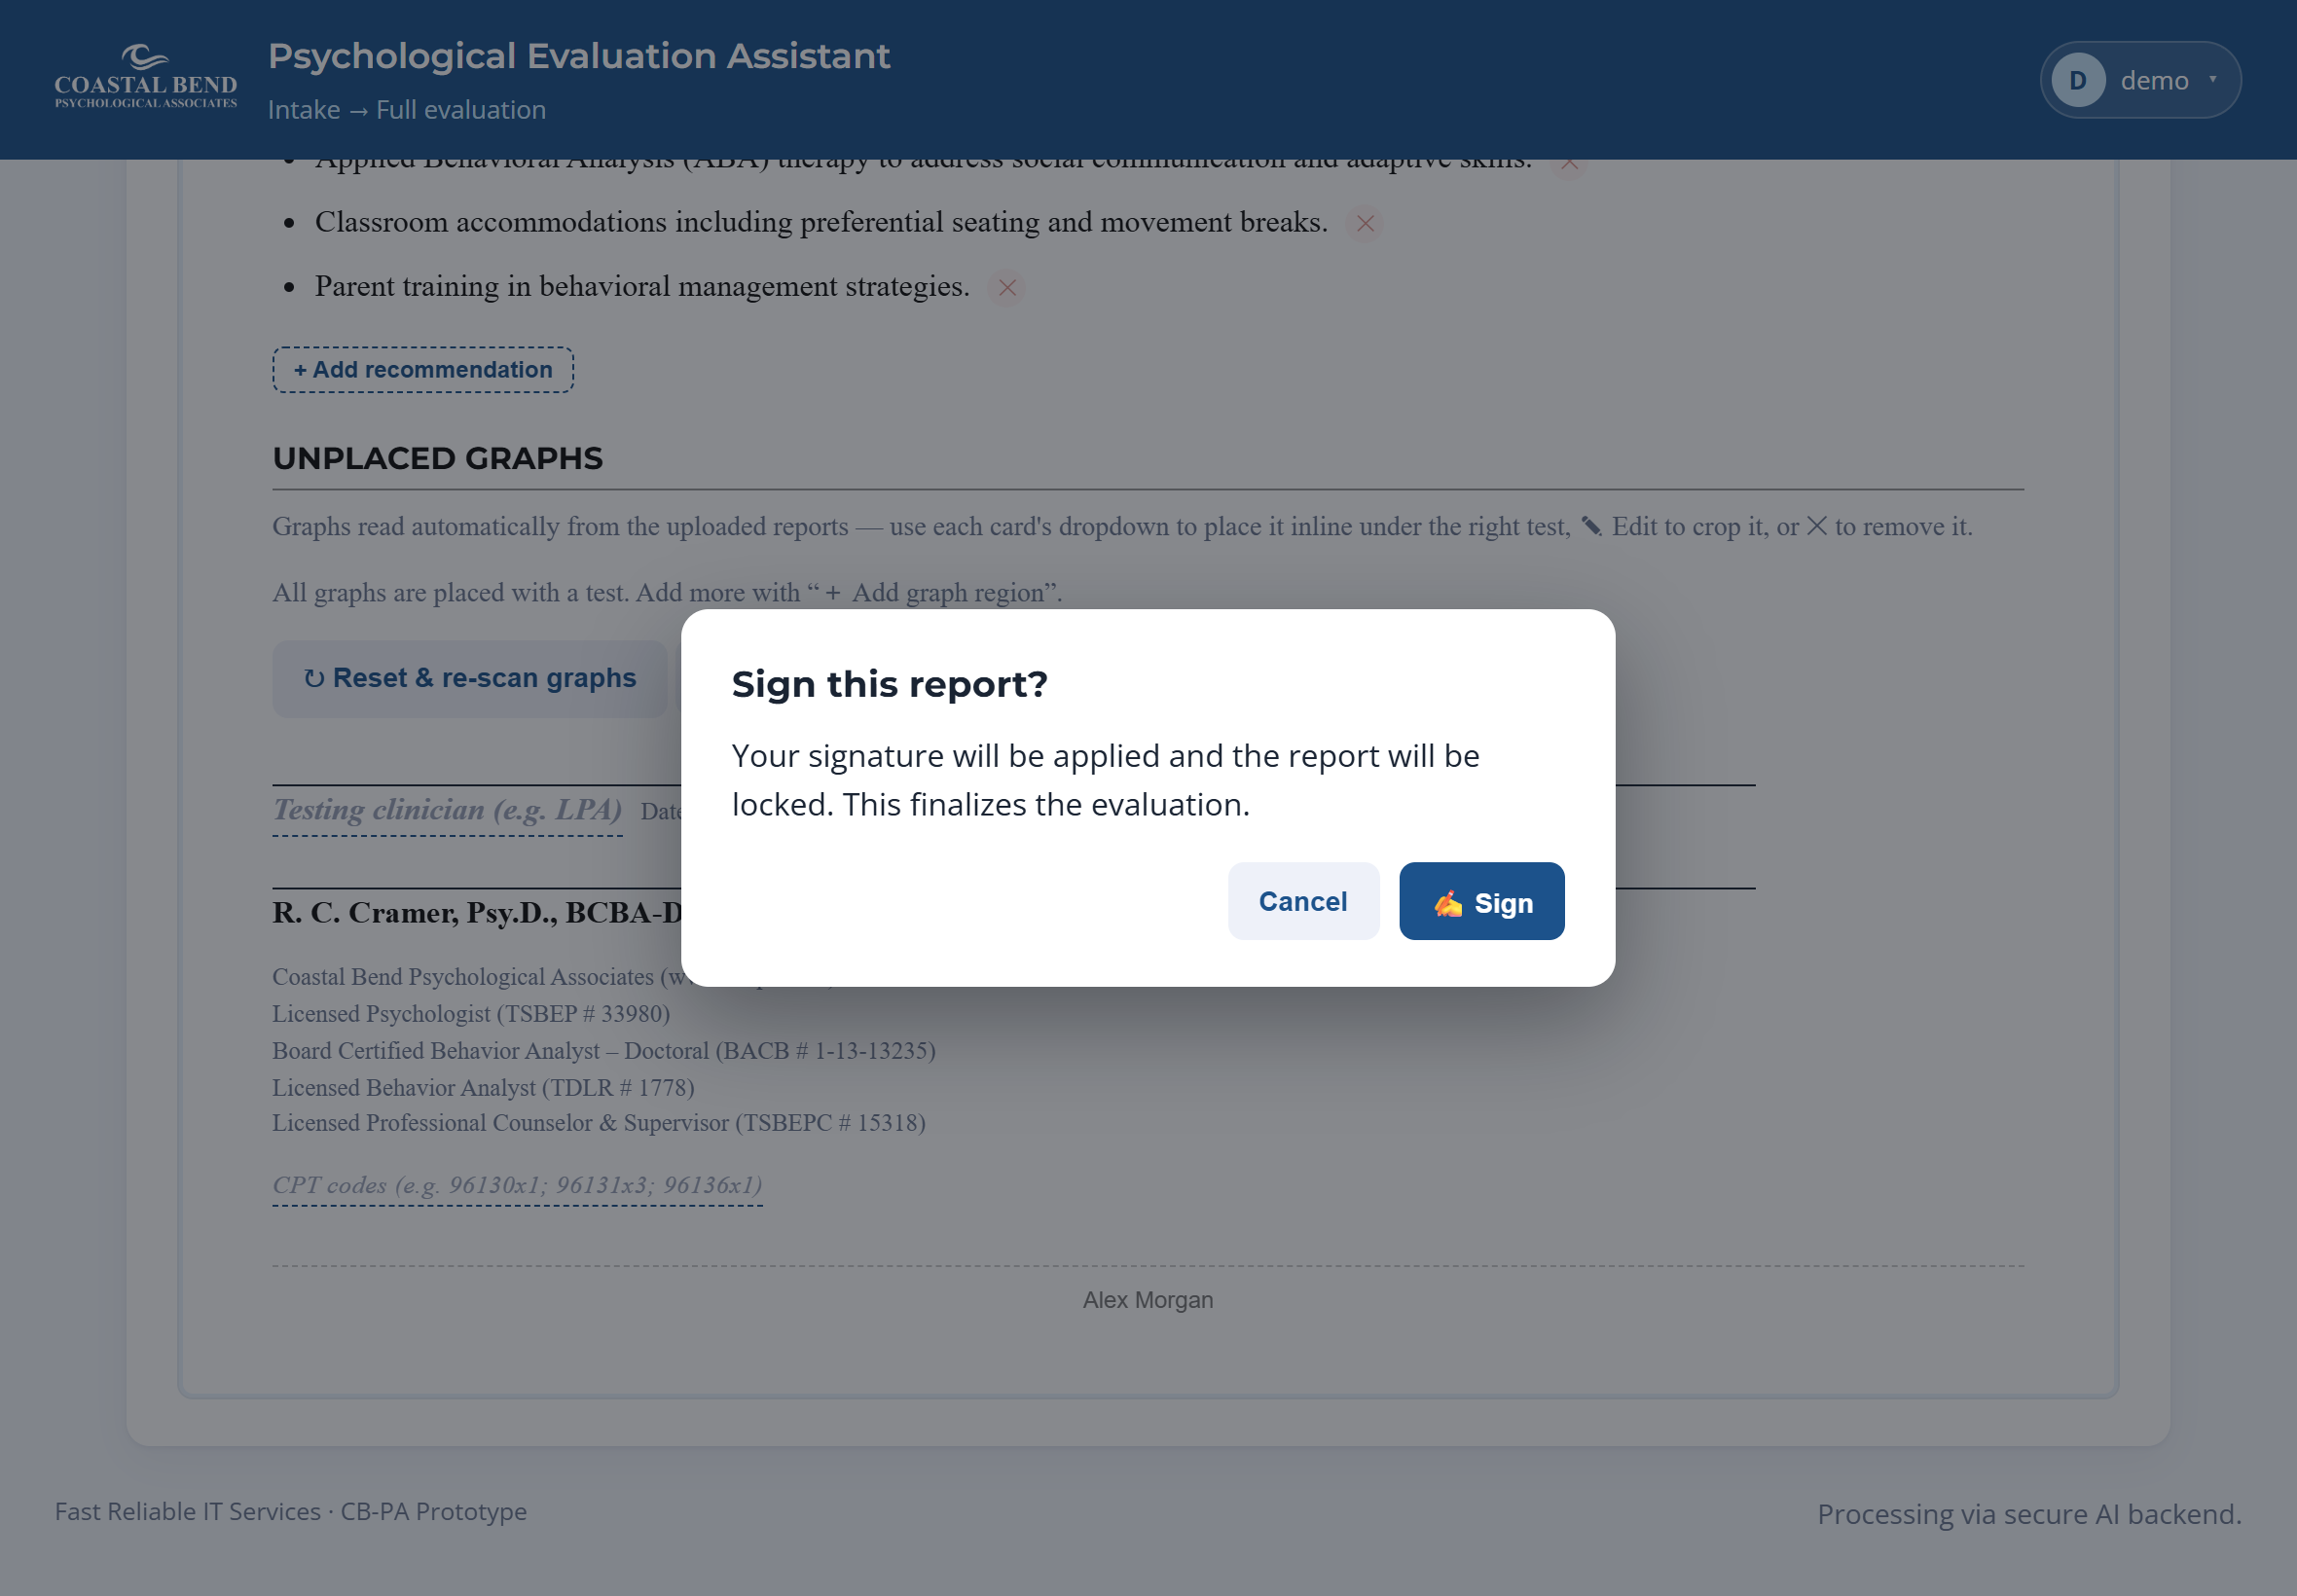
When the drafter is done, they press Submit for review, which hands the evaluation to the psychologist. The psychologist reviews it and presses ✍ Sign to finalize. Signing applies the psychologist's signature and locks the report so it can't be edited. If a correction is needed afterwards, the psychologist can ↩ Remove signature to reopen it for editing (see step 7 and the Psychologist guide) — nothing is lost.
Signing is confirmed before it happens. Only a psychologist who has uploaded their own signature can sign.
7 Export / print ~seconds
As soon as you sign, the finished report reopens read-only so you can produce the final document right away — use 🖨 Print / Preview or ⤓ Export Word at the top.
Signing does not delete the report. It stays available: a psychologist finds it under 🗐 Signed reports (a searchable history you can reprint from), and it can also be opened from its appointment. Open it anytime to Print or Export again — it just can't be edited.
Need to fix something after signing? Open the signed report and press ↩ Remove signature. This withdraws your signature and sends the report back to the review queue, fully editable again. Make the correction and Sign once more — nothing is lost in between.
Guide: Receptionist
Your home screen is Appointments. You have three views — Week, Month, and List — plus a Patients lookup.
➕ Book in SimplePractice ↗ — opens SimplePractice in a new tab. All booking is done there; the app reads it back and shows it on the calendar (clicking an empty slot in Week/Month also opens SimplePractice).
Click an appointment to see its details. Once an evaluation has started on it, the appointment shows a small 🔒 and a discreet notice ("being processed / delivered for review / completed"), and it can no longer be edited or cancelled — this protects work in progress.
Patients — search by name or record ID to see a person's history.
List view shows every appointment in order.
Guide: Drafter
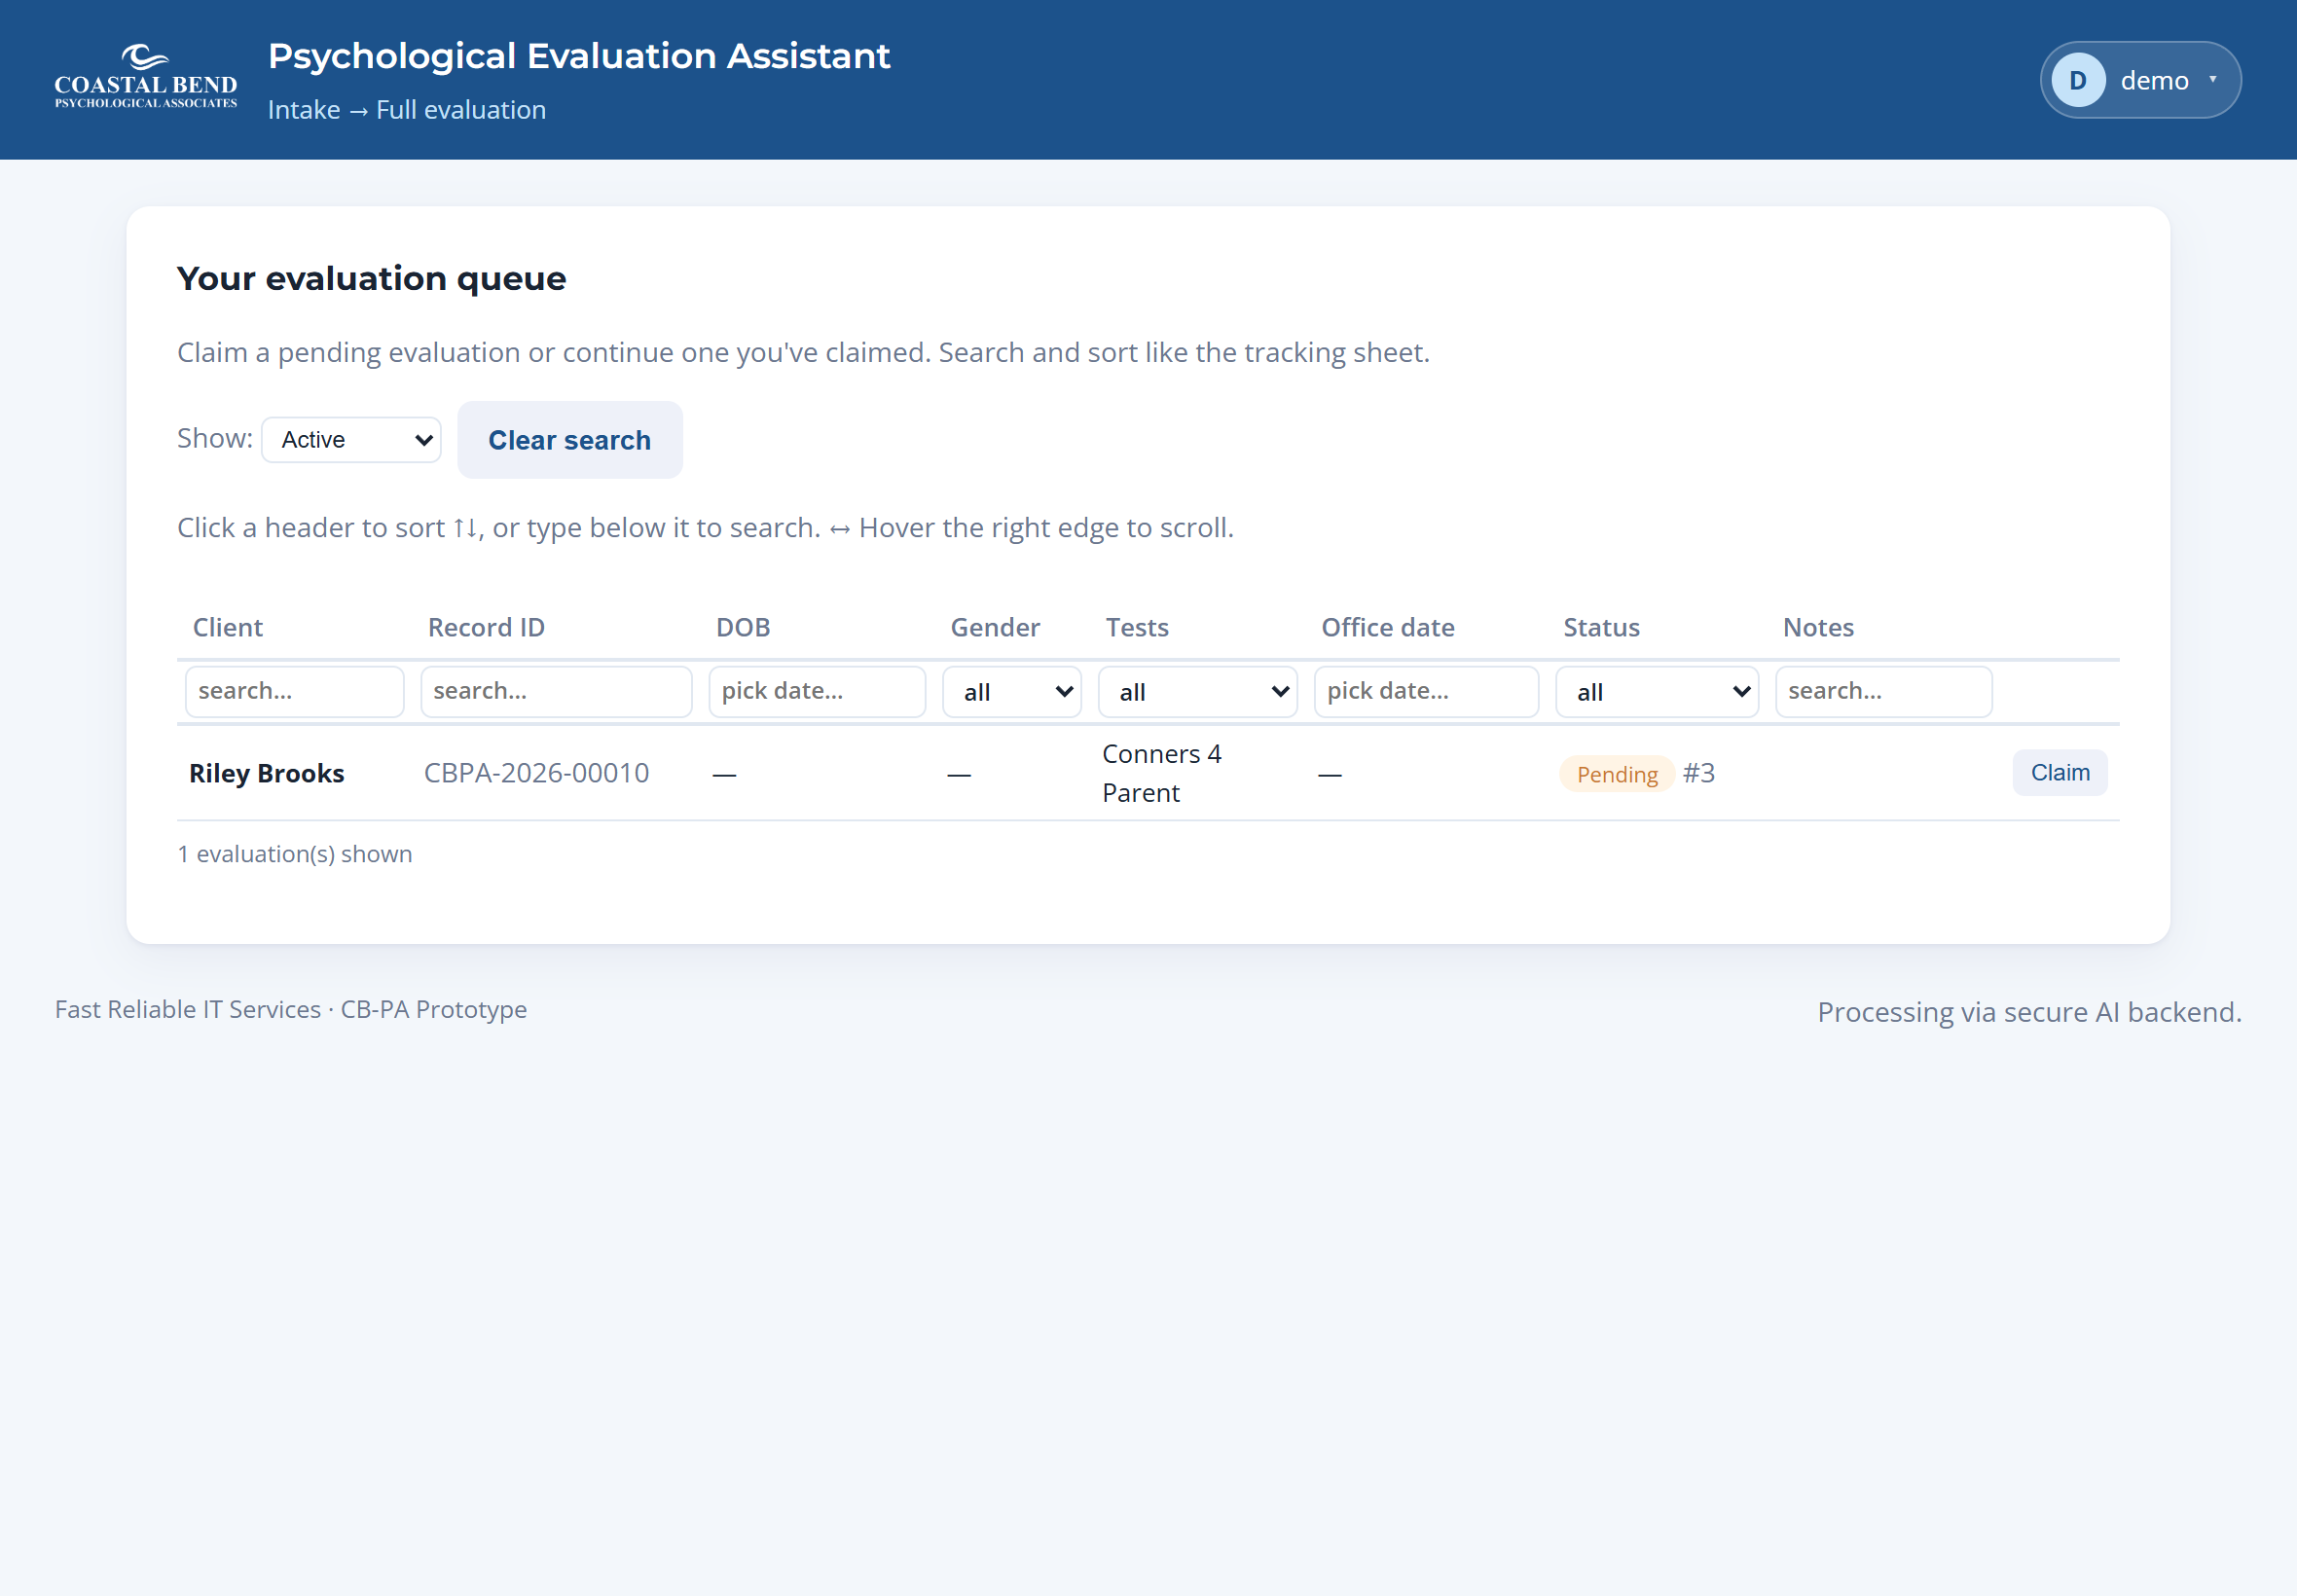
Your dashboard shows the evaluations waiting to be worked. You do the full write-up; the psychologist signs it.
Open a pending evaluation (or claim one from the queue).
Upload the test reports in the Test reports panel (drag & drop PDFs).
Press ✨ Generate report and wait for the draft.
Review and correct everything — verify the scores against the originals, fix any misreads, write/adjust the clinical summaries, set the diagnoses, and check the recommendations.
Press Save as often as you like (it also saves automatically). When finished, press Submit for review to hand it to the psychologist.
Save vs Submit:Save keeps your work but leaves the evaluation with you. Submit for review moves it forward to the psychologist. You cannot sign — that is the psychologist's step.
The drafter's dashboard / work queue.
Guide: Psychologist
You can do everything the drafter does, plus you are the only one who can finalize a report.
✔ Review queue — evaluations submitted for review (or sent back for changes) appear here. Open one to read it.
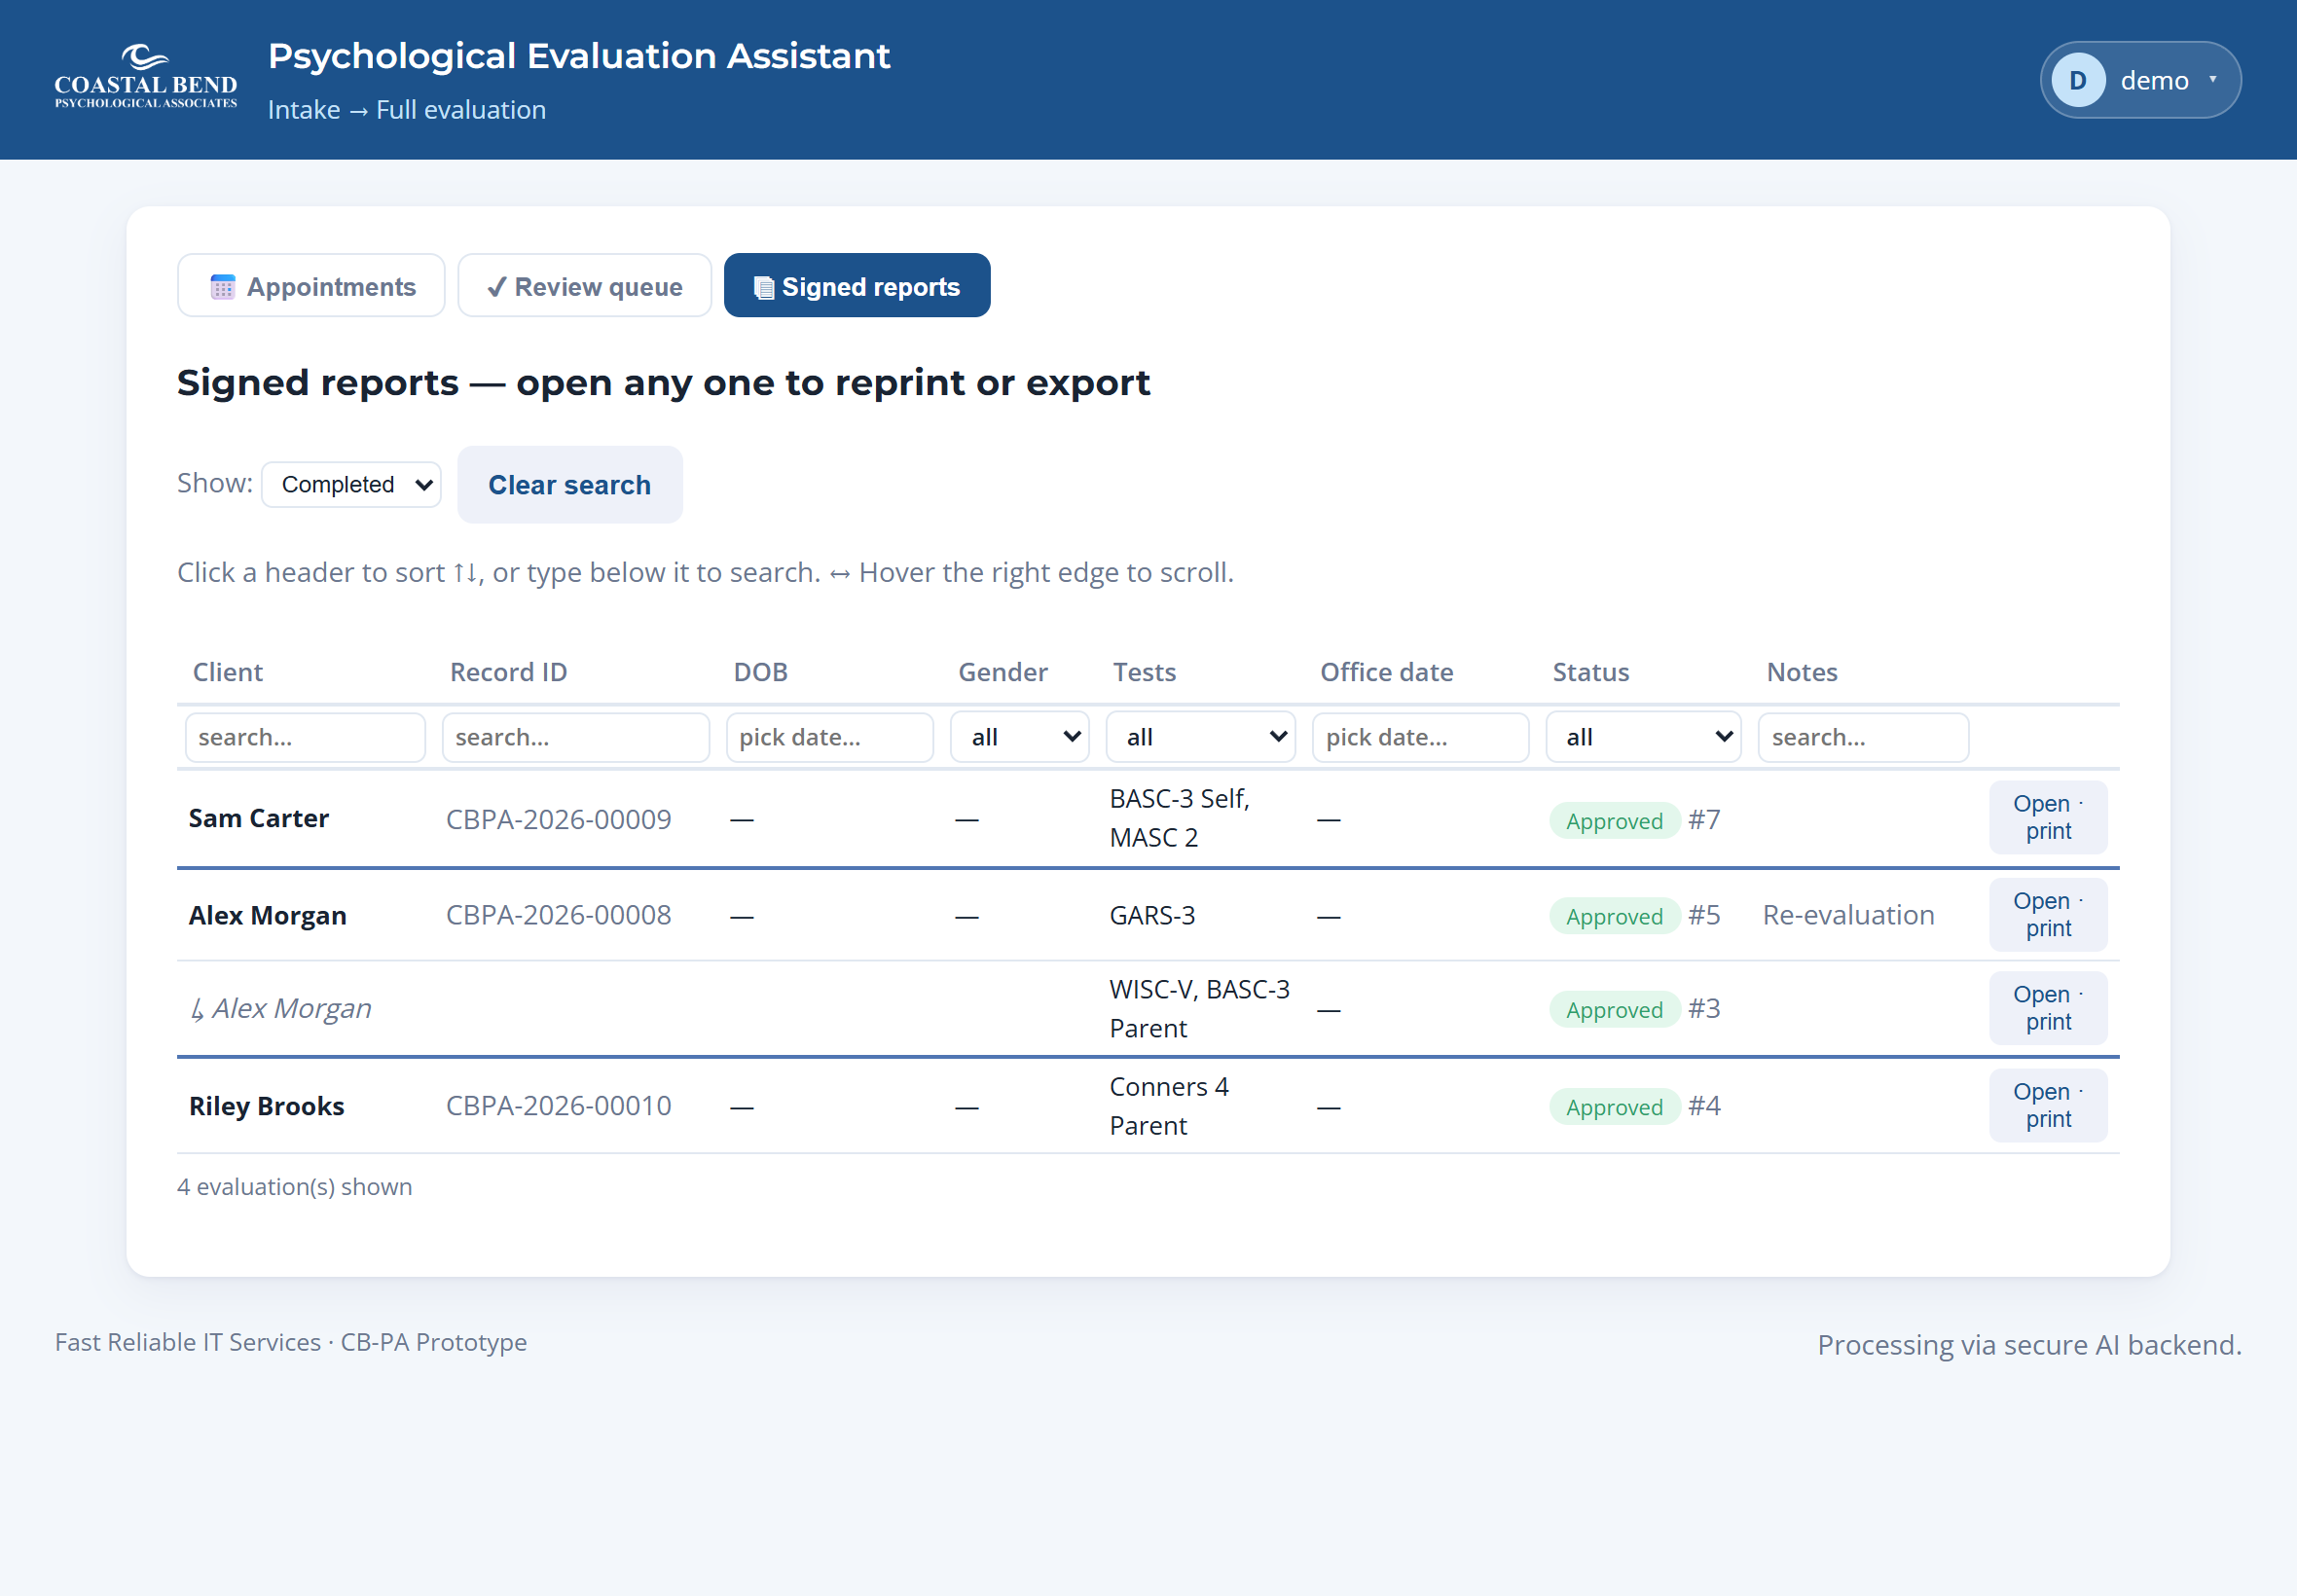
🗐 Signed reports — your searchable history of finished, signed evaluations. Open any one to reprint or re-export it (read-only); repeat visits for the same patient are grouped together.
✍ Sign — applies your signature and locks the report. You must have uploaded your own signature first (Settings → Account → Your signature); each psychologist uses their own, and only you can apply yours.
Request changes — instead of signing, send it back to the drafter with a note about what to fix.
↩ Remove signature — on a report you already signed, this withdraws your signature and moves it back to the ✔ Review queue, fully editable again. Use it when a signed report needs a correction; sign it again when you're done. Nothing is deleted in the meantime.
Signing is the clinical sign-off, so verify the diagnoses and scores first. A signed report is locked for editing — but not permanently: if you find a mistake later, ↩ Remove signature reopens it for editing, then you sign again.
After you sign, the report reopens read-only with 🖨 Print / Preview and ⤓ Export Word ready to use. It is not deleted — it moves to 🗐 Signed reports, your searchable history of finished evaluations (also reachable from the appointment), so you can reopen and reprint/export it whenever you need. Repeat visits for the same patient are grouped together there.
The report toolbar. Sign appears only for psychologists on an unsigned report.On a signed report the toolbar shows 🖨 Print / Preview, ⤓ Export Word, and ↩ Remove signature — the last reopens it for editing (psychologist only).🗐 Signed reports — your history of finished evaluations. Search or sort, then Open · print any one to reprint or re-export. A patient's repeat visits are grouped under their name (↳).
Every panel explained
Test reports (upload) panel
Drop the QGlobal / MHS PDF reports here — several at once is fine. They are the documents the app reads scores and graphs from. Remove one with the ✕; if you remove a document, everything derived from it is removed too.
✨ Generate report
Reads the scores and graphs from the uploaded reports and writes the full evaluation. Run it again any time — it re-writes the report from the current documents and scores. 🔎 Read scores (AI) re-reads just the numbers; ↻ Reset & re-scan graphs re-reads the images.
Only the tests you actually administered appear. The report includes a section for each test that has data (an uploaded report, scores, or a written summary); tests with nothing entered are left out automatically, so you won't get empty placeholder sections.
Score tables & attention flags
Each test's scores appear as a typed table (like the clinic's finals). Cells are editable — correct any misread value, scale name, or classification. The ⚑ flags mark concerning values (red = strongest, amber = milder) and exist only on screen; they never export. What decides a flag is configured per study in Settings → Clinical flags.
Diagnosis picker & table
The DSM-5 / ICD-10 picker sits next to the diagnosis table it fills. Check a box to add that diagnosis; uncheck to remove it. Use + Add diagnosis for anything not in the list, and the ✕ to remove a row. Checking a box only edits the document — it does not call the AI. Recommendations are rebuilt from these diagnoses the next time you press Generate.
Recommendations
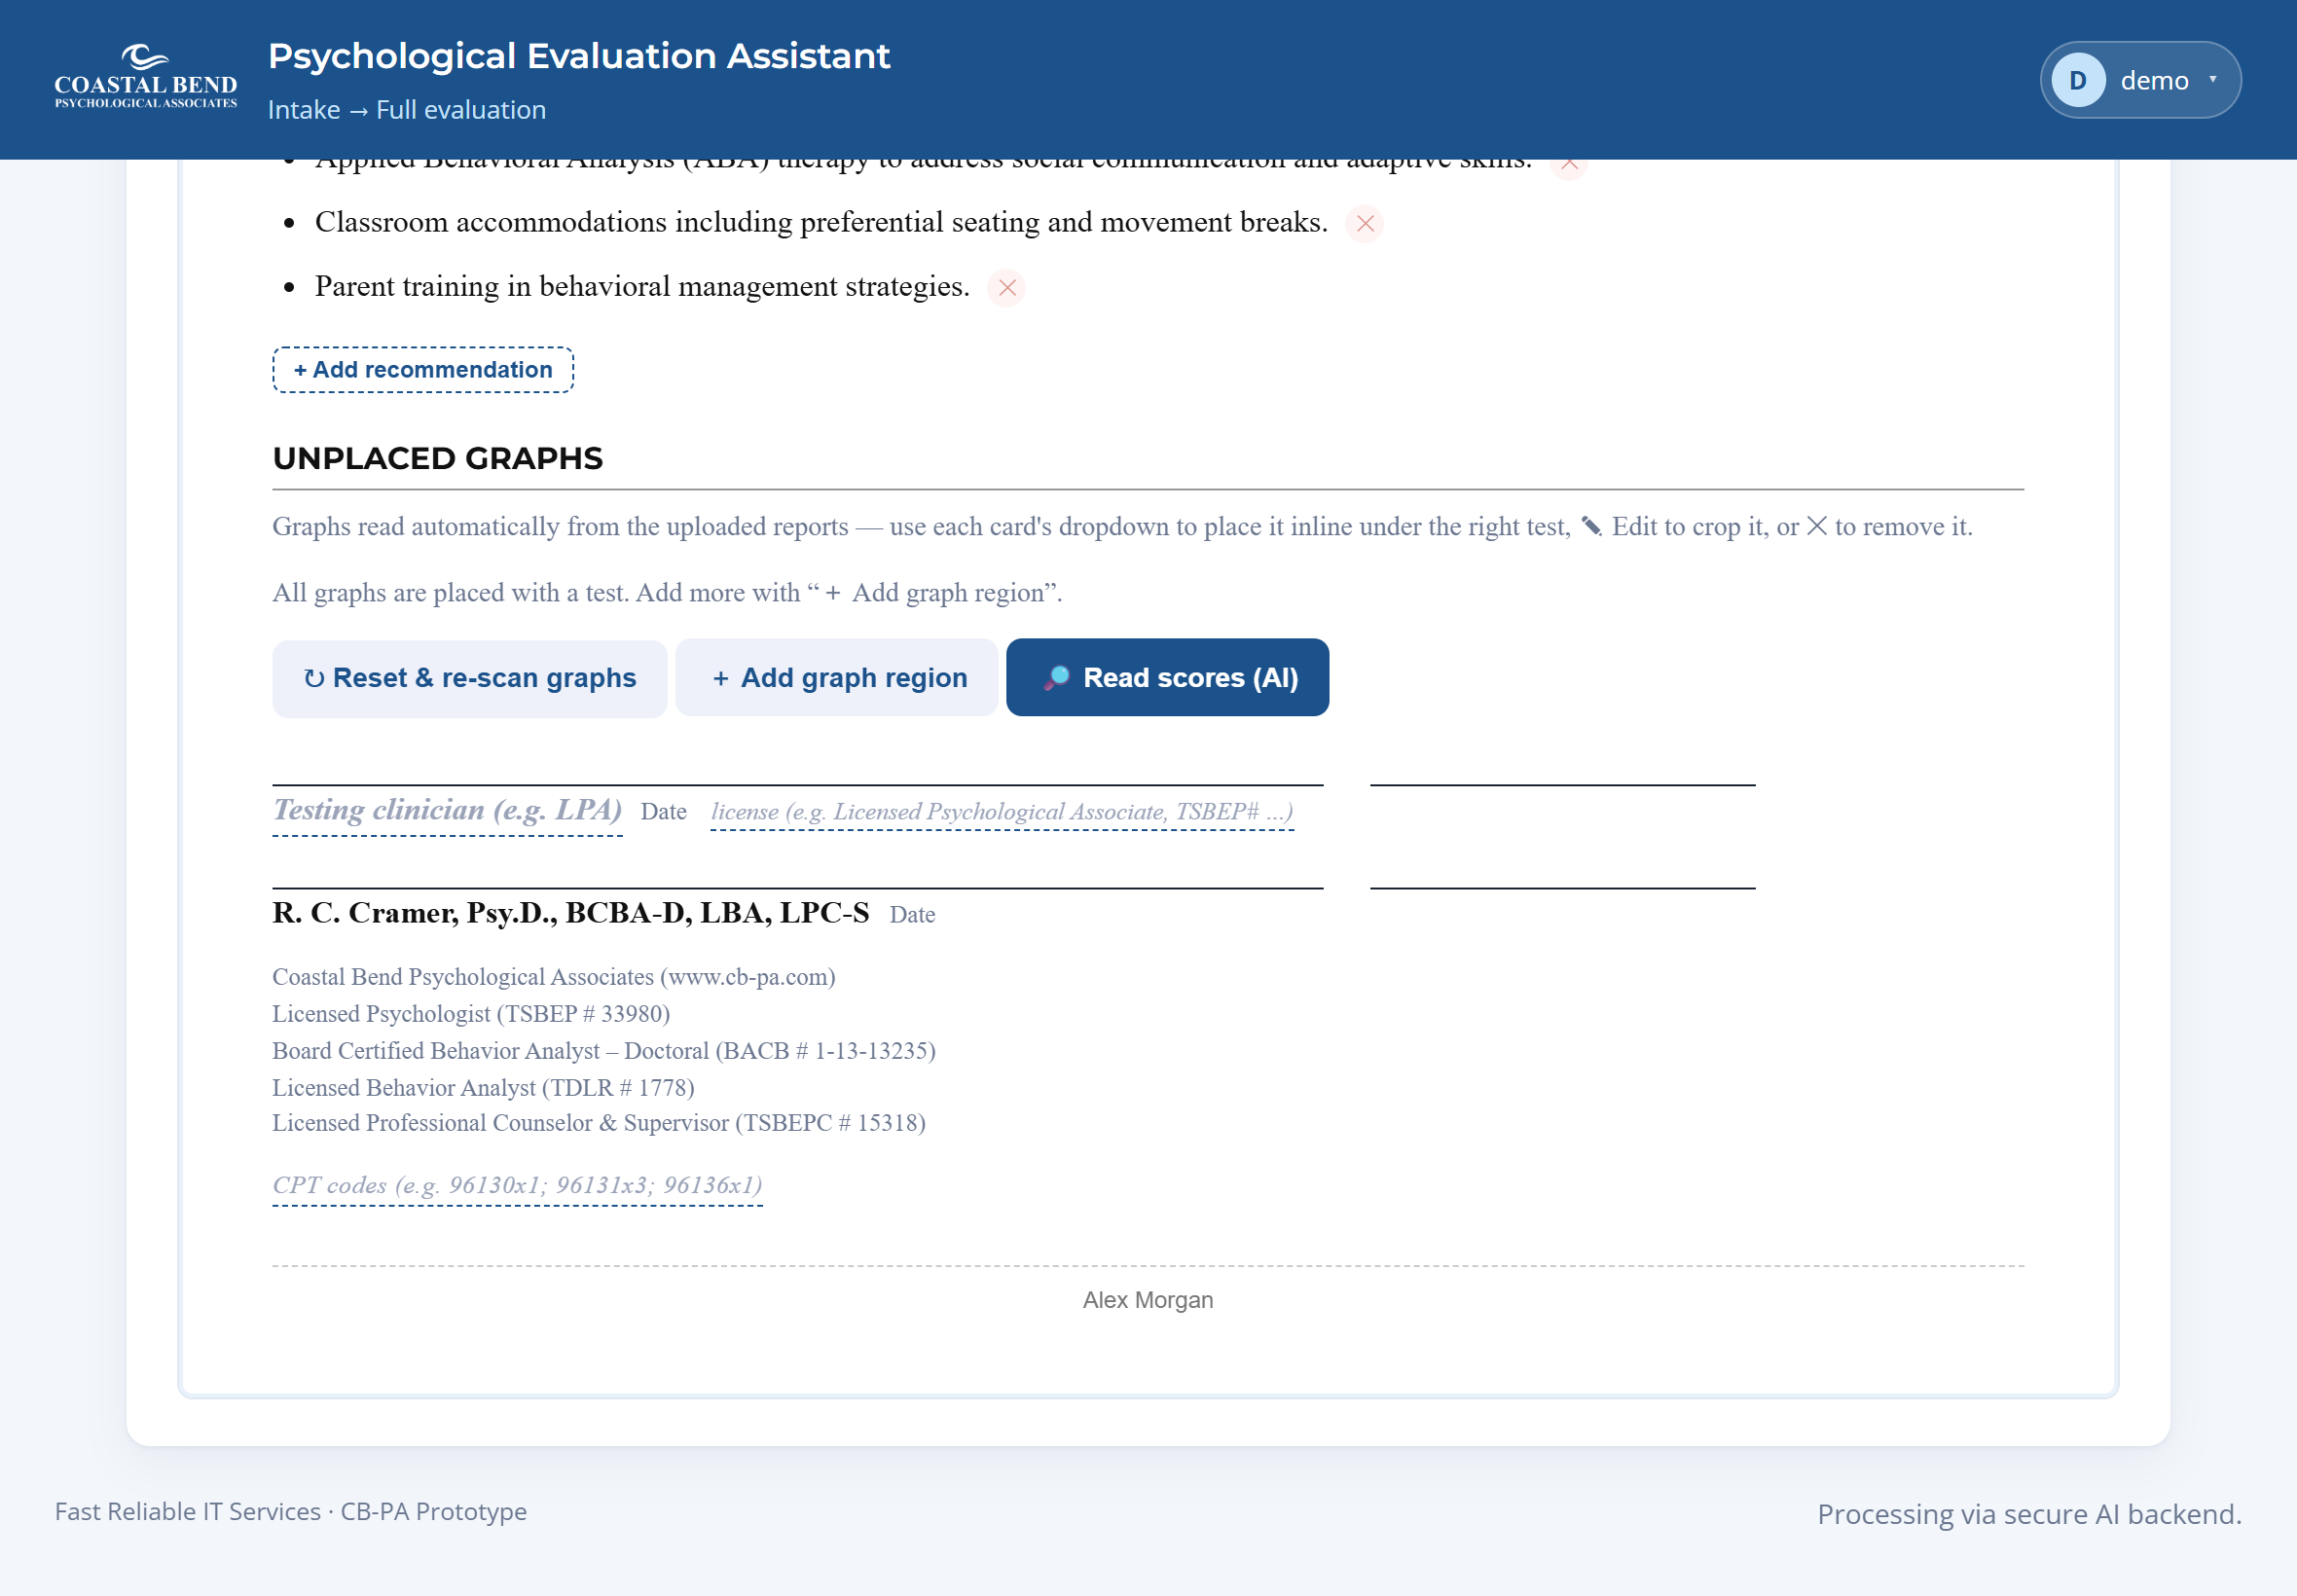
Built from the diagnoses using the clinic's standard wording, plus any case-specific items. Edit any line, remove one with ✕, or use + Add recommendation.
Header & signature
The identity block (name, DOB, dates, clinician) is pre-filled from the patient's appointment record — not read off the documents by the AI — so the name, date of birth and evaluation date are authoritative from the start. It stays editable while the report is a draft: a green check confirms it matches the record, and a flag warns if an edit drifts from it. On a signed report these fields become read-only (see the Psychologist guide to reopen one). The signature line fills with the signing psychologist's uploaded signature once the report is signed.
Settings
Open the account menu (top right) → ⚙ Settings. The tabs you see depend on your role.
Account (everyone)
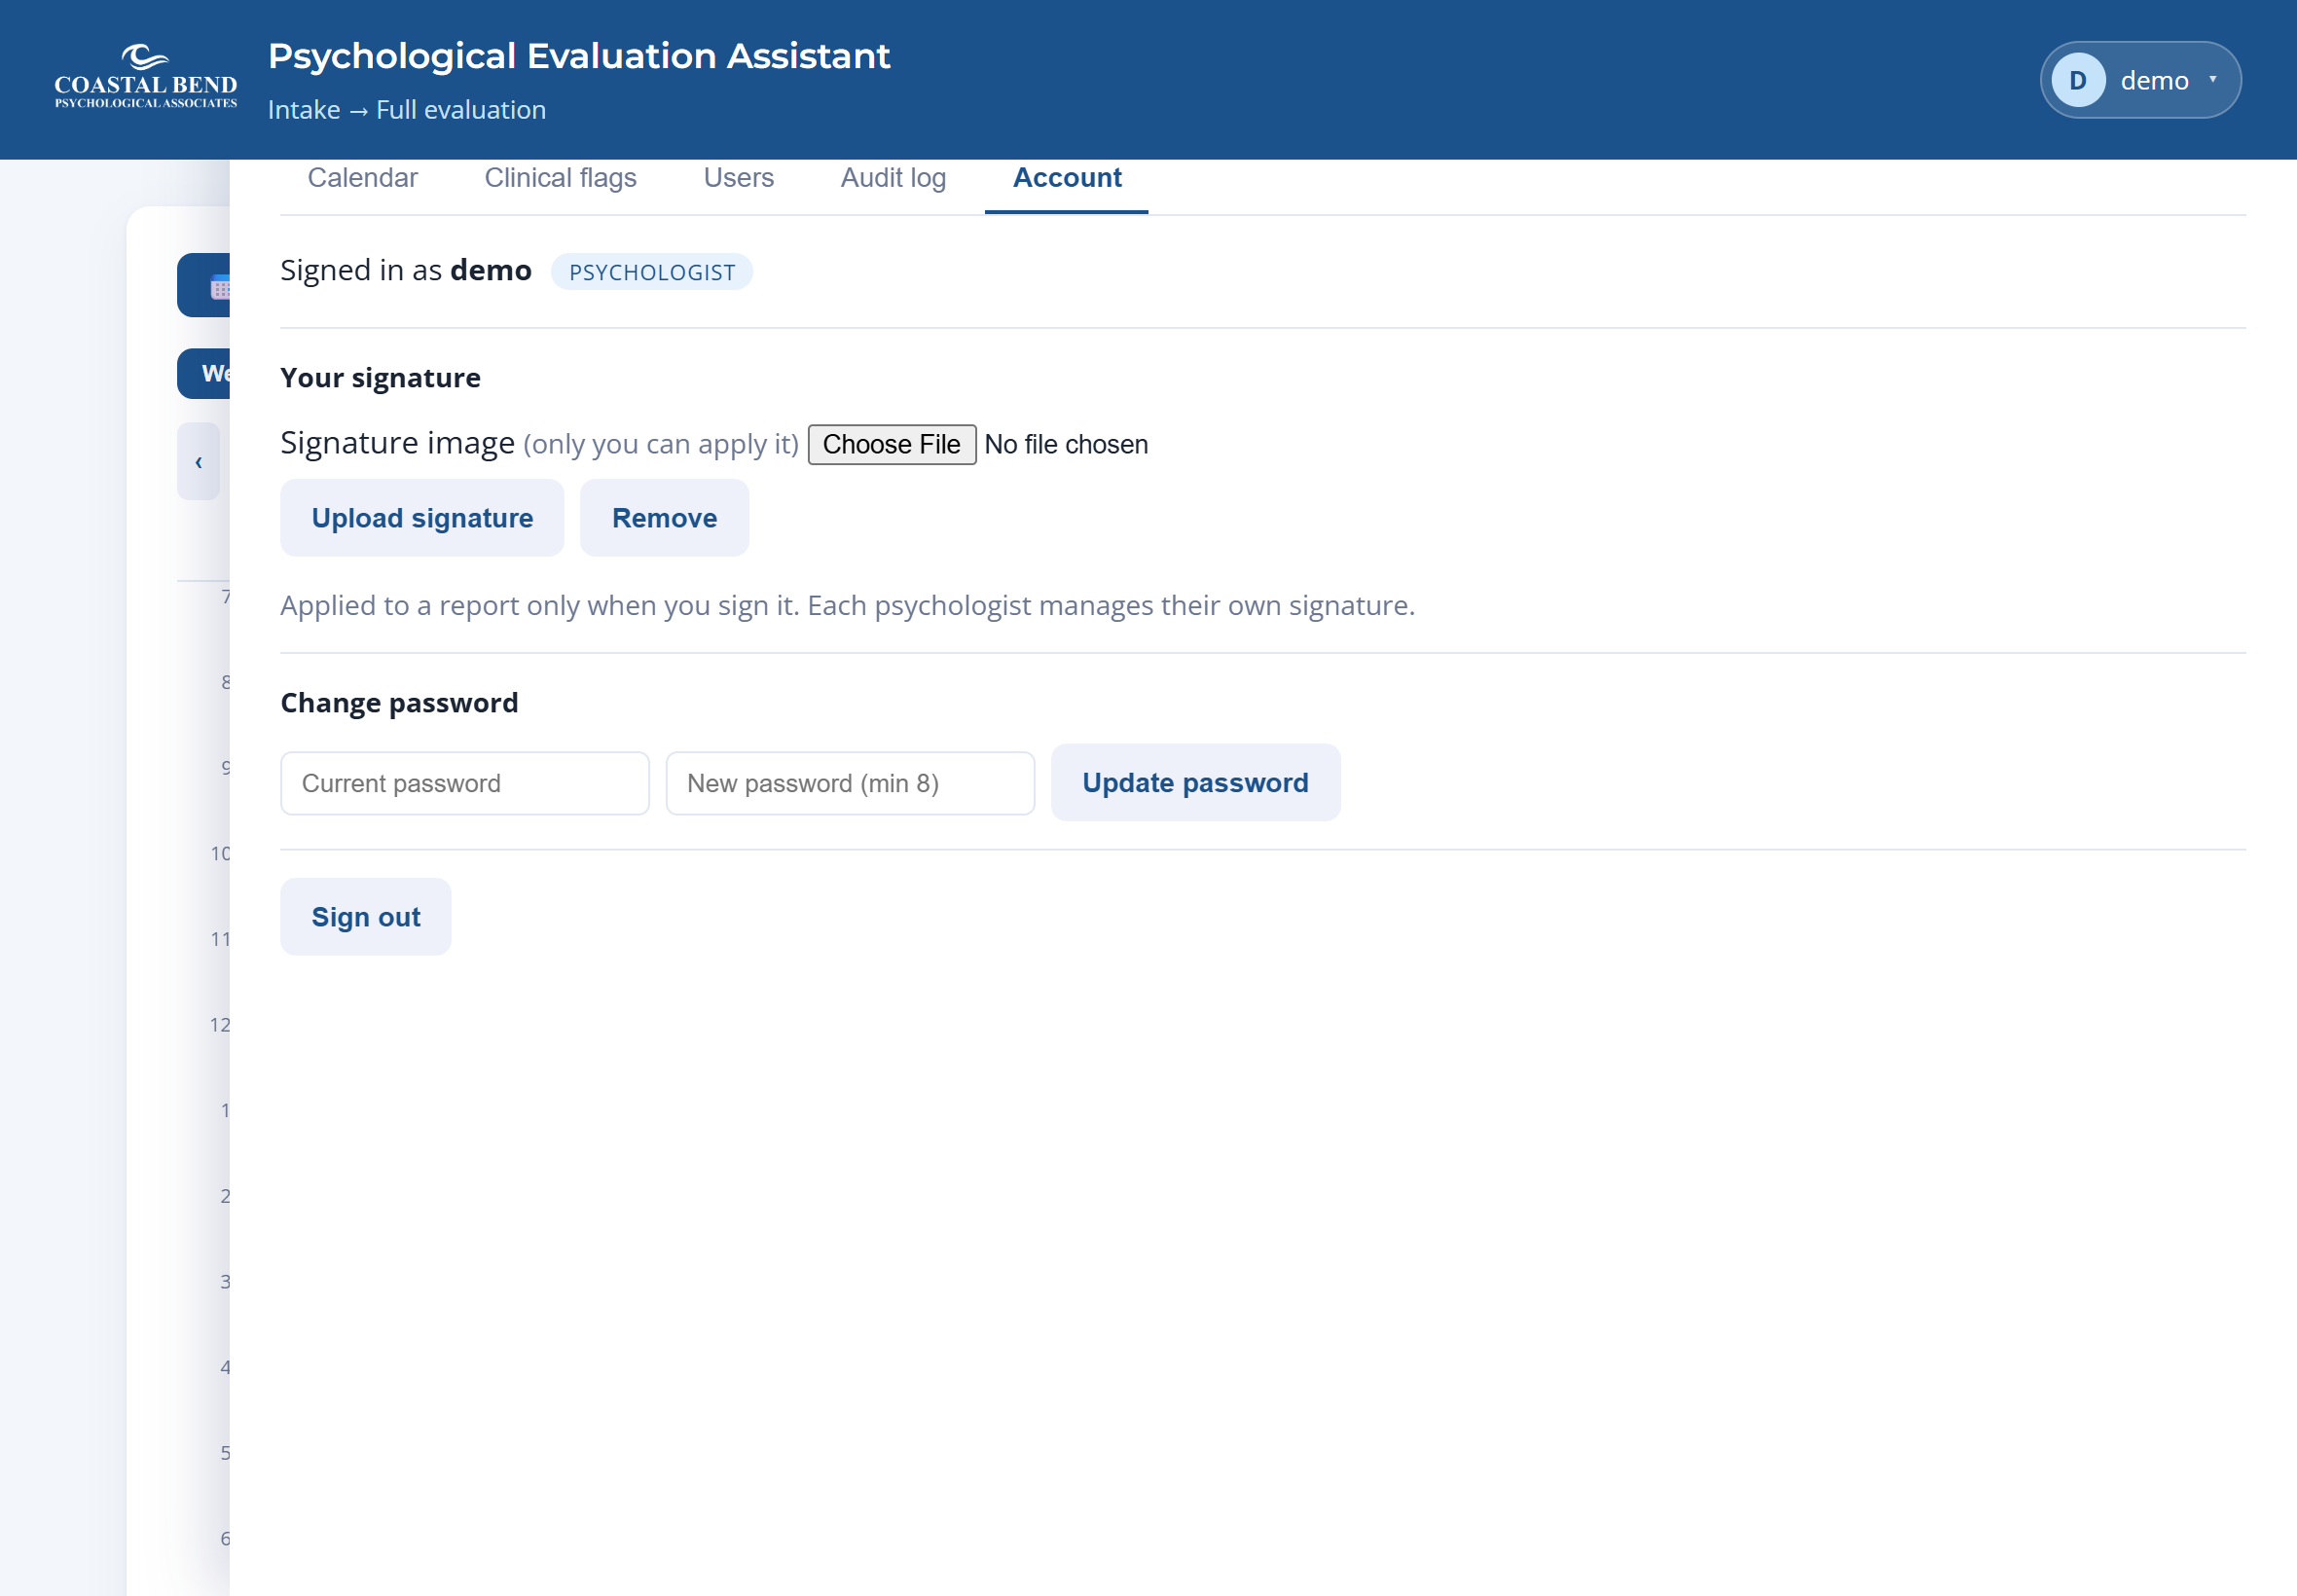
Shows who you are signed in as and lets you change your password. For psychologists, this is also where you upload Your signature — the image is applied to a report only when you sign it, and each psychologist manages their own.
The Account tab. Psychologists upload their signature here.
Calendar (admin)
Holds the SimplePractice iCal URL so booked appointments appear (read-only) on the app's calendar and open in SimplePractice when clicked.
Clinical flags (admin)
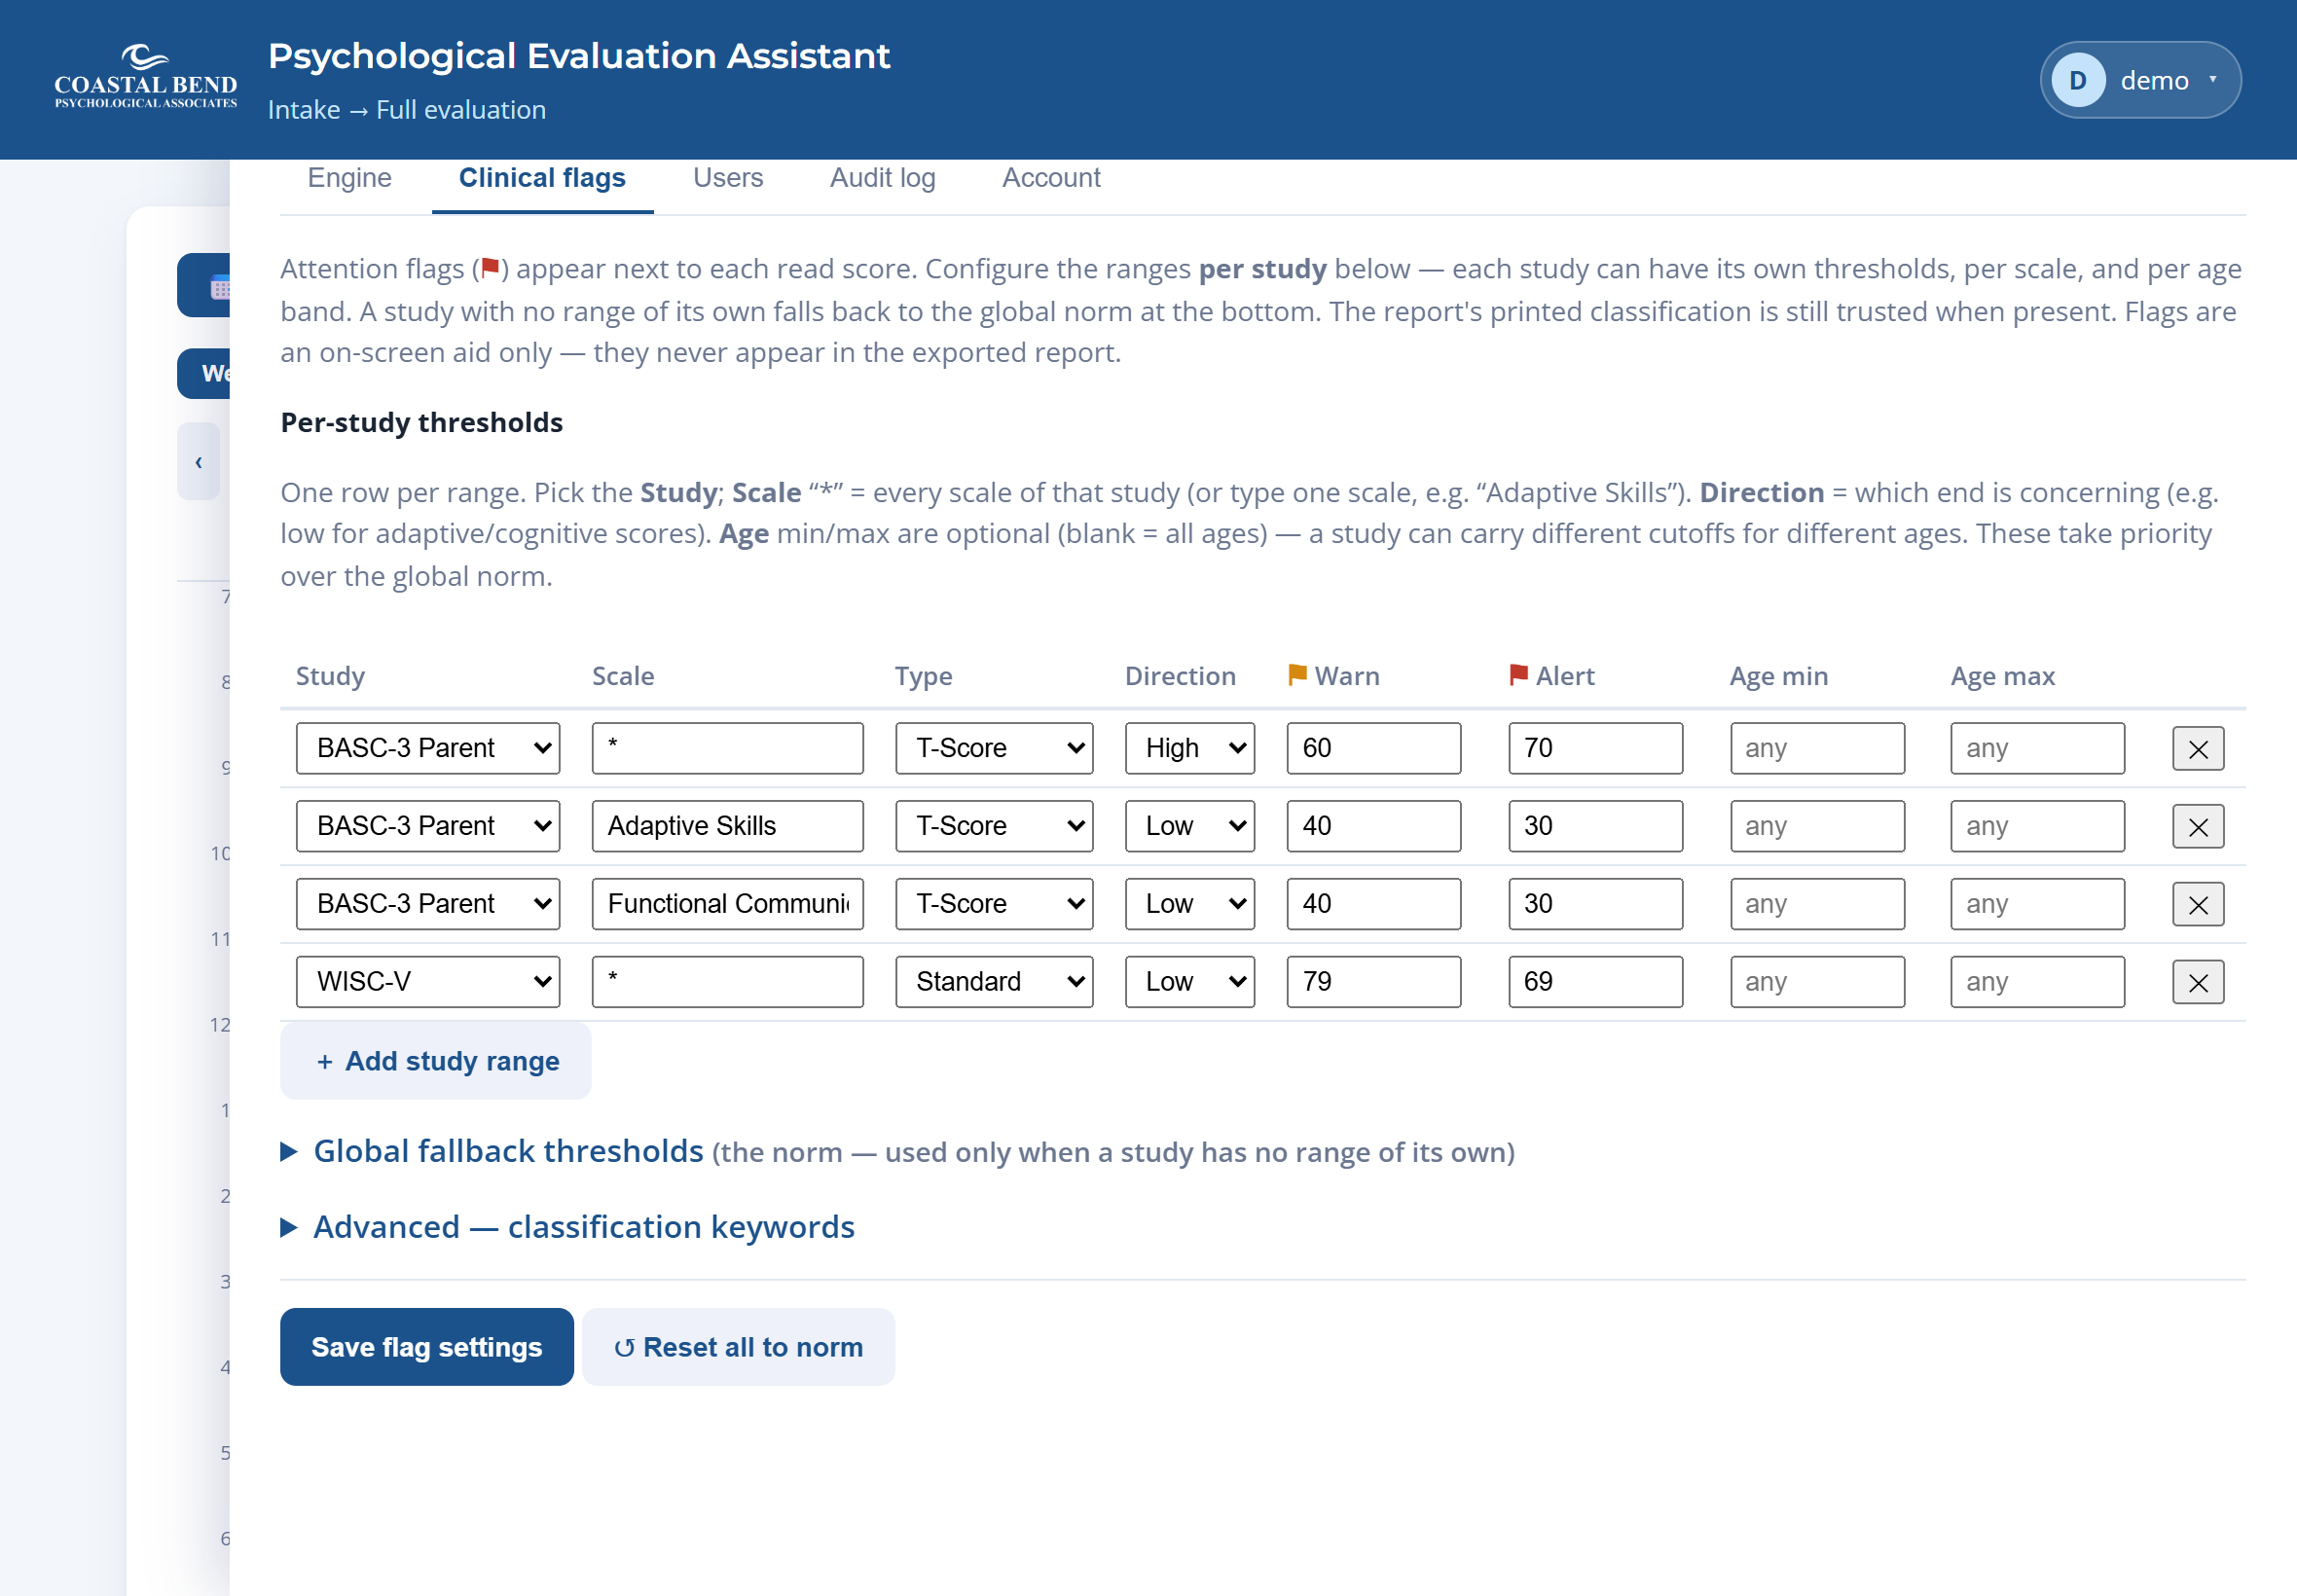
Configure, per study, the score ranges that raise an attention flag: pick the study, set the direction (which end is concerning), the Warn and Alert cutoffs, and optionally an age band. The app ships with faithful, sourced defaults for every instrument (shown as a suggestion you can change; ↺ Norm restores one, ↺ Reset all restores everything).
Per-study thresholds. Your values take priority; the norm is shown as a hint.
Users (admin)
Add someone by their Microsoft email and check the roles they should have (Psychologist / Receptionist / Drafter). Everyone signs in with Microsoft.
FAQ & troubleshooting
Where is my report after I sign it? Signing never deletes it. It reopens read-only right away (Print / Export are at the top). To find it later, a psychologist opens 🗐 Signed reports — a searchable history of every finished evaluation, with repeat visits grouped per patient; it can also be opened from its appointment (and reception can find it with the "completed" filter). Open it anytime to print or export again — it just can't be edited.
I need to change a report I already signed. Open it and press ↩ Remove signature (top of the report, psychologist only). That withdraws your signature and sends it back to the ✔ Review queue, fully editable again. Fix what you need and Sign again — the report is never lost in between.
The dates or name on a signed report look wrong / I can't edit them. A signed report is read-only on purpose, so its fields can't be changed by accident. Identity (name, DOB, evaluation date) is filled from the patient's appointment record, not guessed by the AI. If something is genuinely wrong, use ↩ Remove signature to reopen it, correct the field, and sign again.
A score looks wrong. Click the cell and correct it — the AI may have misread it. Always compare the tables to the original reports before signing.
The graphs didn't appear / are under the wrong test. Use ↻ Reset & re-scan graphs, or each graph card's dropdown to place it under the right test.
I can't edit an appointment. Once an evaluation has started on it, the appointment locks (🔒) so work in progress isn't disturbed.
The Sign button says I have no signature. Go to Settings → Account → Your signature and upload yours; only then can you sign.
I checked three Autism levels by accident. Each level is independent — uncheck the ones you don't want, or remove the row with ✕.
Did my work save? Yes — the draft saves automatically, and a "Saved" indicator confirms it. If a save ever fails you'll see a "⚠ Not saved" warning.
Generating the draft…
Extract intake data
Select template (gender + prognosis)
Generate Background (CB-PA format)
Populate header
Map test sections
Assign DSM-V / ICD-10 diagnosis
Assemble document
Evaluation draft
✎ The draft is editable. Click any section to correct, remove, or add text before exporting.